Last updated: February 2026
Planning your first hiking trip? Or maybe you’re a seasoned hiker looking to reorganize your planning process? Either way, you’ve come to the right place. This comprehensive hiking planning guide will walk you through everything you need to know—from choosing the most fitting trail to packing essential gear and staying safe on the mountains.
Whether you’re planning a simple day hike or an epic multi-day backpacking adventure, these 10 proven steps will help you create unforgettable outdoor experiences while avoiding common mistakes that can ruin your trip.
*This post may contain affiliate links. If you use them, I may earn a small commission at no extra cost to you.
Table of Contents
Step 1: Set Your Hiking Goals and Assess Your Group
Define What You Want From Your Hike
Before you start researching trails or buying gear, ask yourself: what’s the real purpose of this hiking trip? Are you looking for:
- An intense physical challenge and workout?
- A peaceful escape into nature for mental health?
- Instagram-worthy photo opportunities?
- Quality bonding time with friends or family?
- A chance to test your outdoor survival skills?
Your answer to the “why” should guide every decision from here on out, so be honest about what you’re hoping to achieve with your trip.
Match the Trail to Your Group’s Abilities
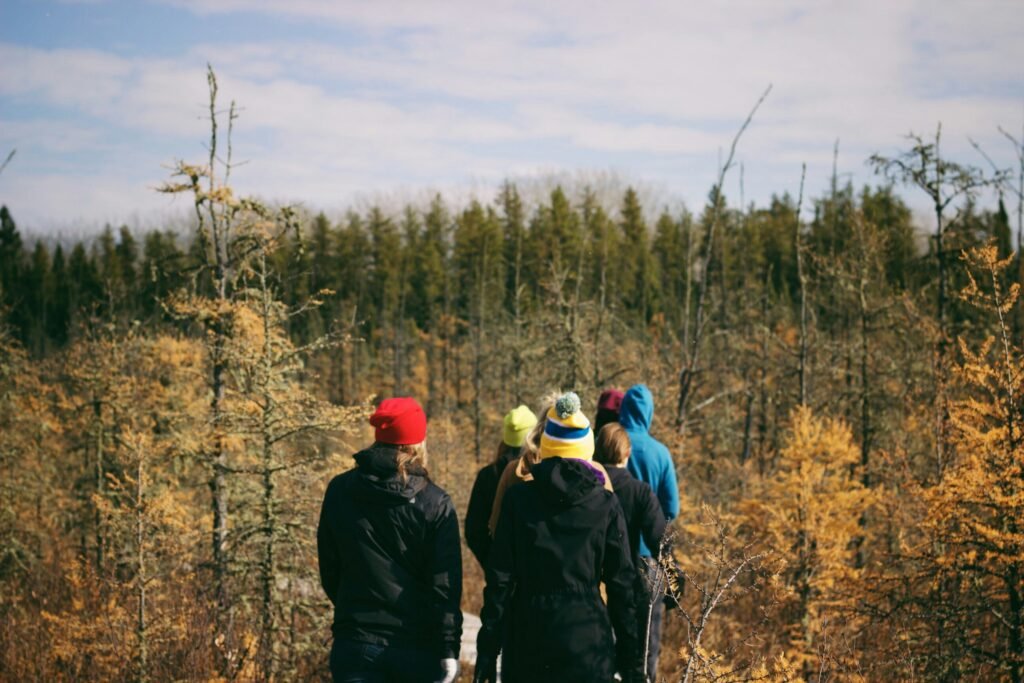
Unless you’re hiking solo. Here’s where many hiking trips go wrong: choosing a trail based on the strongest hiker instead of the group’s average ability. Before picking any destination, honestly assess:
- Fitness levels: Can everyone comfortably walk for several hours?
- Hiking experience: How many have done multi-mile hikes before?
- Mental toughness: Who gets anxious with heights or exposure?
- Age range: Are you hiking with kids, seniors, or mixed ages?
Pro tip: It’s better to choose an “easy” trail that everyone enjoys than a challenging one that leaves half your group miserable.
If you’re not sure how difficult a certain hike is, try hiking difficulty calculator together with Hiking Skill Level Assessment.
Consider Your Real-World Constraints
Don’t forget the practical stuff that can easily ruin your hike. Consider:
- Time availability: Weekend trip vs. week-long expedition
- Budget limitations: Gas, permits, gear, and food costs
- Transportation: How many cars? Who will be driving? Where will you leave the cars and how will you pick them up?
- Group size: Larger groups need more planning and slower pace
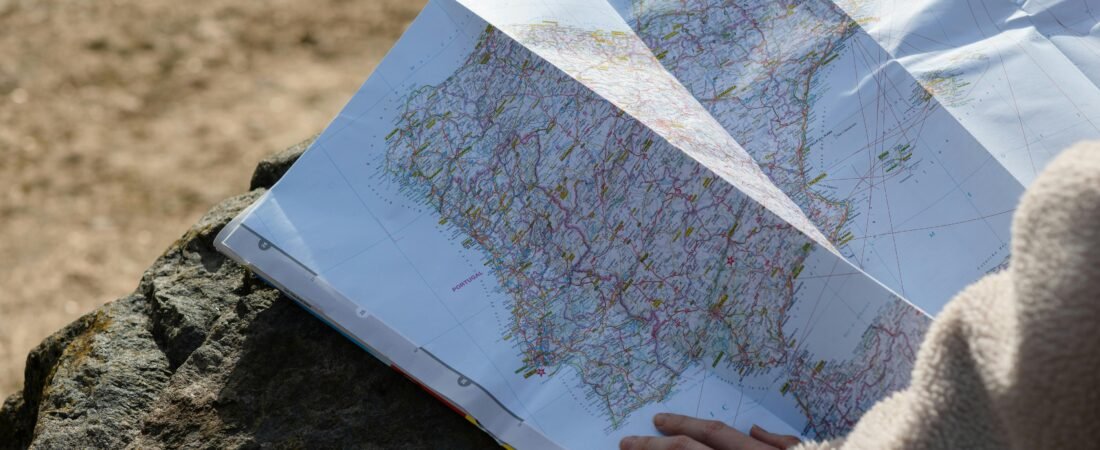
Step 2: Choose the Perfect Hiking Trail and Destination
Research Trails Like a Pro
Gone are the days of picking trails randomly from guidebooks. Here’s how to research hiking destinations in 2025:
Best Hiking Apps and Websites:
- AllTrails: Over 400,000 trail maps with recent reviews
- Gaia GPS: Detailed topographic maps and offline downloads
- Hiking Project: Community-driven trail database
- Local park websites: Always check official sources for closures
What to Look For:
- Total distance and elevation gain
- Trail surface (rocky, sandy, paved, etc.)
- Recent trip reports and photos
- Seasonal considerations (snow, mud, heat warnings)
- Crowd levels and best times to visit
Evaluate Trail Difficulty Honestly
Don’t just trust the “easy/moderate/hard” ratings. These can vary wildly between different sources. Instead, look at:
- Stream crossings: Will you need to wade through water?
- Exposure levels: Are there dangerous cliff edges or drop-offs?
- Navigation complexity: Is the trail well-marked or wilderness route-finding?
- Escape routes: Can you bail out early if needed?
- Weather dependency: Is this trail dangerous in rain/wind?
Secure Permits and Reservations Early
Many of the best hiking destinations require advance planning:
- National parks: Some require timed entry reservations months ahead
- Overnight permits: Popular backpacking areas fill up fast
- Parking reservations: Even day hikes may require parking permits
- Camping spots: Reserve campsites as soon as bookings open
Money-saving tip: Check for less popular nearby trails that don’t require permits but offer similar experiences.
Step 3: Create Your Detailed Hiking Itinerary
Plan Your Daily Hiking Schedule
A good itinerary prevents you from getting stuck in dangerous situations after dark. Here’s how to build yours:
Daily Planning Checklist:
- Morning start time and estimated finish
- Total miles and elevation gain per day
- Planned lunch spots and major rest breaks
- Water refill opportunities
- Campsite locations (for multi-day trips)
- Alternative routes if weather turns bad
Calculate Realistic Hiking Times
Use this proven formula as your starting point: 2 miles per hour + 1 additional hour per 1,000 feet of elevation gain
Then adjust based on:
- Trail conditions (rocky, muddy, overgrown)
- Your group’s typical pace
- Photo stops and extended breaks
- Pack weight (heavier = slower)
Example: A 6-mile hike with 2,000 feet of elevation gain = 3 hours hiking + 2 hours for elevation = 5 hours total, plus breaks.
Build in Backup Plans
Weather changes, injuries happen, and people get tired. Always have Plan B ready:
- Shorter route options: Can you cut the hike short if needed?
- Weather alternatives: Indoor activities or easier trails nearby
- Emergency exits: How do you get out quickly if someone gets hurt?
- Extra time buffers: Add 25% more time than your estimates
Step 4: Organize Transportation and Logistics
Getting to the Trailhead
Vehicle Requirements:
- Check if you need 4WD or high-clearance vehicles
- Look up current road conditions and seasonal closures
- Plan for shuttle services if starting/ending at different locations
- Consider carpooling to reduce environmental impact
Trailhead Logistics:
- Parking availability and costs (some charge $10-30 per day)
- Restroom facilities and water availability
- Bear boxes or food storage requirements
- Cell phone coverage for emergency communication
Book Accommodations in Advance
Popular hiking areas fill up quickly, especially during peak seasons:
- Campsites: Reserve national/state park campsites months ahead
- Hotels/hostels: Book nearby lodging early for better rates
- Backcountry camping: Understand designated vs. dispersed camping rules
- Hiker hostels: Great budget option near famous long-distance trails
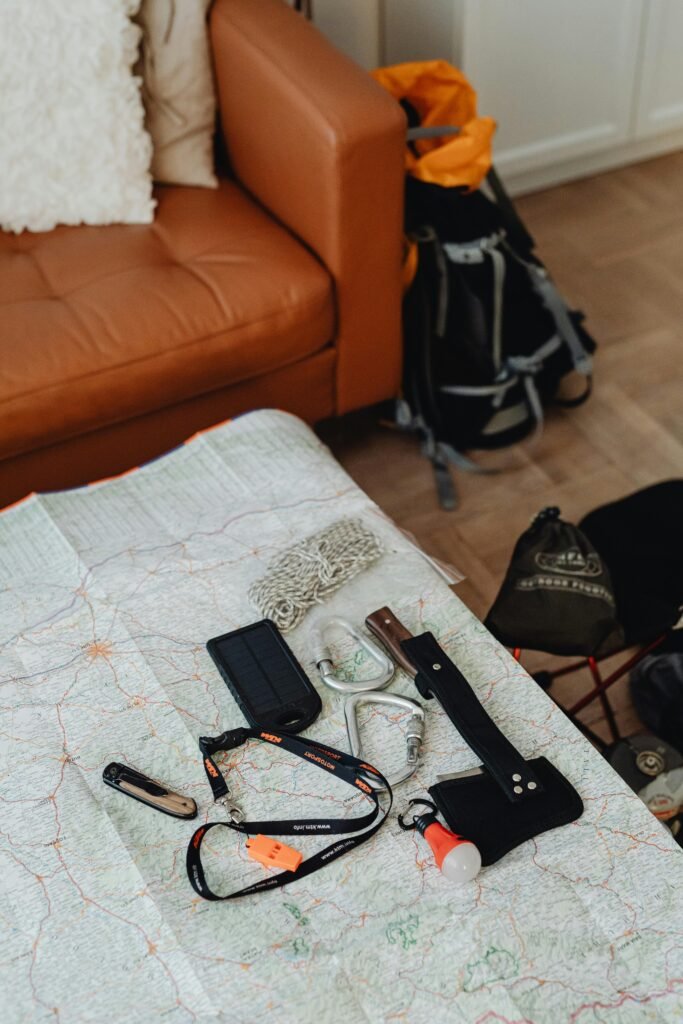
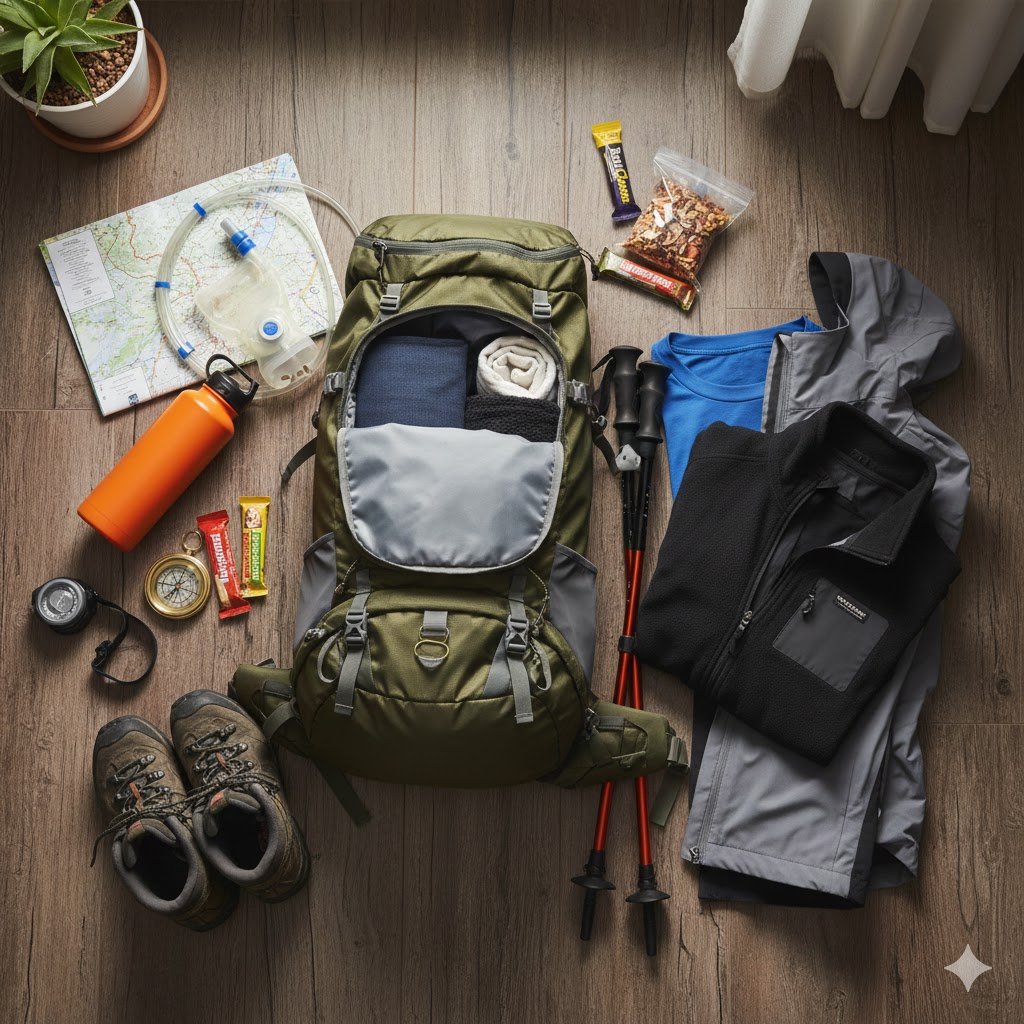
Step 5: Pack Essential Hiking Gear (Complete Checklist)
The 10 Essential Systems for Every Hike
Never hit the trail without these life-saving items:
- Navigation: Map, compass, GPS device or smartphone app (recommend: Suunto MC-2 Compass, Garmin eTrex 32x GPS)
- Headlamp: Plus extra batteries (Black Diamond Spot 400)
- First aid kit: Bandages, pain relievers, any personal medications (Adventure Medical Kits Ultralight Watertight .7, Surviveware Small First Aid Kit)
- Knife or multi-tool: For gear repairs and food prep (Leatherman Wave Plus, Gerber Paraframe Mini Knife (lightweight budget option))
- Fire starter: Waterproof matches or lighter (UST StrikeForce Fire Starter)
- Emergency shelter: Space blanket or bivy sack (SOL Emergency Bivvy)
- Extra food: More than you think you’ll need
- Extra water: Plus purification method (LifeStraw Personal Water Filter, Sawyer Products MINI Water Filtration System)
- Extra clothes: Rain gear and insulating layers (How to Layer Clothes for Hiking)
- Sun protection: Sunglasses, sunscreen, hat (Neutrogena Ultra Sheer Dry-Touch Sunscreen SPF 55)
Day Hiking Gear Checklist
Clothing and Footwear:
- Moisture-wicking hiking socks (bring extras)
- Broken-in hiking boots or trail shoes
- Quick-dry hiking pants or shorts
- Moisture-wicking base layer
- Insulating mid-layer (fleece or down)
- Waterproof/breathable rain jacket
- Sun hat and warm beanie
Read: Hiking Footwear Guide, How to Layer Clothes for Hiking
Backpack and Accessories:
- Properly fitted day pack (20-35 liters)
- Trekking poles for stability and knee protection
- Water bottles or hydration reservoir
- Snacks and lunch
- Camera and extra batteries
- Cash for parking or permits
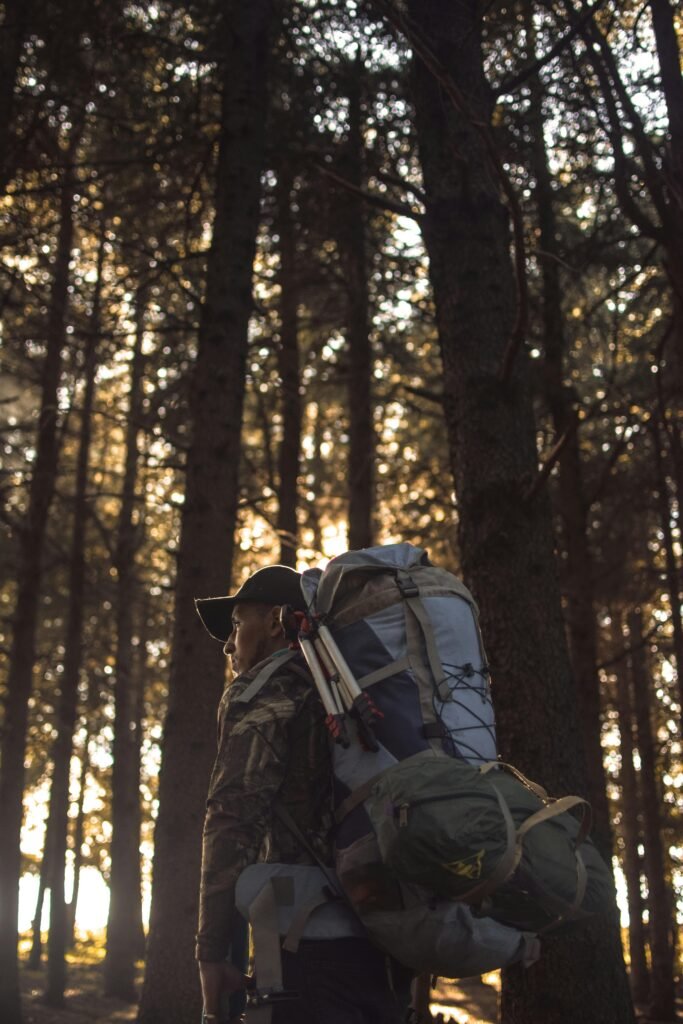
Multi-Day Backpacking Gear
Add these items for overnight trips:
- Lightweight tent or tarp shelter
- Sleeping bag rated for expected temperatures
- Sleeping pad for insulation and comfort
- Backpacking stove and fuel
- Lightweight cookpot and utensils
- Bear canister or rope for food storage
- Quick-dry underwear and extra socks
- Biodegradable soap and trowel
- Water filter or purification tablets
Gear Testing is Crucial
Never use untested gear on important trips:
- Break in new boots: Wear them on several shorter hikes first
- Practice tent setup: Can you do it quickly in bad weather?
- Test your stove: Learn how to light and adjust it properly
- Adjust your pack: Proper fit prevents back and shoulder pain
Step 6: Master Navigation and Route Planning
Download Offline Maps Before You Go
Cell service disappears quickly in the mountains. Prepare for offline navigation:
Recommended Navigation Apps:
- Gaia GPS: Professional-grade topo maps, $40/year
- AllTrails Pro: Easy interface with offline maps, $60/year
- CalTopo: Free detailed topographic maps
- Avenza Maps: Download specific park maps for free
Always Carry Physical Backups:
- Waterproof topographic map of your area
- Compass that works without batteries
- Basic knowledge of how to use them together
Understand Trail Marking Systems
Different areas use different trail marking methods:
- Painted blazes: Colored rectangles on trees (white = main trail)
- Cairns: Stacked rock piles in areas above treeline
- Signs: More common in national parks and popular areas
- None: Wilderness areas often have minimal marking
Read: How to Read a Trail Map and Navigate Without Getting Lost
Learn these universal signals:
- Right turn: Blaze offset to the right
- Left turn: Blaze offset to the left
- Trail junction: Double blazes
- End of trail: Three blazes in triangle formation
GPS Technology Tips
Modern GPS devices are incredibly helpful, but don’t rely on them completely:
- Batteries die: Always carry extras or a solar charger
- Screens break: Keep devices in protective cases
- Satellite coverage: GPS can be spotty in deep canyons
- User error: Learn basic map and compass skills as backup
Step 7: Plan Food and Water Strategy
Hiking Nutrition That Actually Works
Your body burns 2,500-4,500 calories per day while hiking. For more in depth dive into nutrition: Hiking Nutrition: What to Eat Before, During & After for Best Performance. A short summary – here’s how to fuel for hiking properly:
Breakfast Ideas (400-600 calories):
- Instant oatmeal with dried fruit and nuts
- Granola with powdered milk
- Protein bars and coffee
- Bagel with peanut butter
Lunch Options (600-800 calories):
- Tortillas with hummus, cheese, and jerky
- Trail mix with dried fruit and nuts
- Tuna packets with crackers
- Energy bars and electrolyte drinks
Dinner for Backpackers (700-1000 calories):
- Dehydrated camping meals (Mountain House, Backpacker’s Pantry)
- Pasta with olive oil and parmesan
- Rice with beans and spices
- Couscous with dried vegetables
Essential Snacks:
- Trail mix (nuts, seeds, dried fruit)
- Energy gels for quick fuel
- Jerky for protein
- Dark chocolate for morale
More on snacks: The Ultimate Guide to the Best Trail Snacks: 10 Nutritious Options Ranked by Hikers
Water Planning and Purification
How Much Water Do You Need?
- Day hiking: 1-2 liters minimum
- Hot weather: Add 0.5-1 liter per hour of hiking
- High altitude: 25% more than usual
- Multi-day trips: 2-4 liters per day plus cooking water
More in-depth look at hydration: Hiking Hydration Guide
Reliable Water Purification Methods:
- Sawyer Squeeze filter: Removes bacteria and parasites
- UV sterilizers (SteriPEN): Kills all microorganisms quickly
- Water purification tablets: Lightweight backup option
- Boiling: Always works but uses fuel and time
Pro tip: Research water sources along your route beforehand. Springs are usually safer than streams, and flowing water is better than stagnant.
Step 8: Safety and Emergency Preparedness
Conduct a Pre-Trip Risk Assessment
Think through what could go wrong and how you’ll handle it:
Weather Hazards:
- Lightning storms above treeline
- Flash floods in slot canyons
- Hypothermia from sudden temperature drops
- Heat exhaustion in desert environments
Terrain Risks:
- Rockfall in mountainous areas
- River crossings during snowmelt
- Getting lost in unmarked wilderness
- Dangerous wildlife encounters
Human Factors:
- Injuries from falls or overuse
- Group conflicts and decision-making
- Running out of food or water
- Equipment failures
Emergency Action Plans
Communication Strategy:
- Share detailed itinerary with emergency contacts
- Set check-in times and stick to them
- Carry satellite messenger (Garmin inReach, Zoleo) for remote areas
- Know where cell coverage exists along your route
If Someone Gets Injured:
- Assess the situation: Is it life-threatening?
- Provide first aid: Stop bleeding, stabilize, keep warm
- Call for help: Use satellite messenger or send someone for help
- Signal for rescue: Mirror, whistle, bright clothing
- Stay put: Don’t make the situation worse by moving an injured person
Group Separation Protocol:
- Designate meeting points along the trail
- Set time limits for how long to wait
- Establish who goes for help vs. who stays
- Everyone should carry emergency supplies
Essential Safety Gear
First Aid Kit Contents:
- Adhesive bandages (various sizes)
- Gauze pads and medical tape
- Antiseptic wipes and antibiotic ointment
- Pain relievers (ibuprofen, acetaminophen)
- Anti-diarrheal medication
- Personal prescriptions
- Emergency whistle
- Space blanket
Communication Devices:
- Fully charged cell phone in waterproof case
- Portable battery pack or solar charger
- Satellite messenger for remote areas
- Emergency whistle (three sharp blasts = help needed)
Step 9: Train Your Body and Practice Skills
Physical Conditioning for Hiking
You don’t need to be an athlete, but some preparation prevents injury and makes the experience more enjoyable:
Cardio Training (4-6 weeks before):
- Walk or hike 3-4 times per week
- Gradually increase distance and elevation
- Include stairs or hill training
- Practice hiking with a loaded pack
Strength Training Focus:
- Legs: Squats, lunges, calf raises
- Core: Planks, mountain climbers
- Back: Rows and deadlifts for pack carrying
- Ankles: Balance exercises to prevent sprains
Break in Your Feet:
- Wear your hiking boots on all training walks
- Start with short distances and build up
- Pay attention to hot spots and blister formation
- Consider custom insoles if you have foot problems
More on training and recovery:
- How to Build Endurance for Multi-Day Trekking?
- How to Train for Hiking? Complete Guide
- Stretching and Recovery for Hikers: Complete Guide to Post-Hike Care
Practice Essential Skills at Home
Gear Familiarity:
- Set up and break down your tent in your backyard
- Practice lighting and adjusting your camping stove
- Learn to pack your backpack efficiently
- Test all electronic devices and learn their features
Navigation Skills:
- Take a basic map and compass class
- Practice following trails on your phone app
- Learn to identify landmarks and terrain features
- Understand basic weather reading
First Aid Knowledge:
- Take a wilderness first aid course
- Practice treating common hiking injuries
- Learn to recognize signs of altitude sickness
- Understand when to evacuate vs. treat in place
Step 10: Final Pre-Departure Checklist
Last-Minute Gear Check
48 Hours Before Departure:
- Lay out all gear and check against your packing list
- Charge all electronic devices fully
- Check battery levels in headlamps, GPS devices
- Confirm you have all permits and reservations
- Check weather forecasts for your destination
Day Before Departure:
- Fill water bottles and check filtration systems
- Pack food in bear-proof containers if required
- Do final gear weight check and adjust
- Confirm transportation and departure times
- Leave detailed itinerary with emergency contact
Weather Monitoring and Adaptation
Check Multiple Weather Sources:
- National Weather Service for official forecasts
- Mountain-forecast.com for high-elevation conditions
- Local ranger stations for current trail conditions
- Weather apps with hourly breakdowns
Be Ready to Adapt:
- Pack extra layers if temperatures drop
- Consider postponing if severe weather threatens
- Have backup indoor activities planned
- Know when conditions become too dangerous
Final Group Communication
Hold a brief meeting with all participants to confirm:
- Roles and responsibilities: Who’s the designated leader?
- Pace expectations: How fast will you hike?
- Decision-making process: Who decides if you turn back?
- Emergency procedures: What’s the plan if someone gets hurt?
- Gear sharing: Who’s carrying group items like stove, first aid?
Common Hiking Trip Planning Mistakes (And How to Avoid Them)
Mistake #1: Overestimating Your Abilities
The Problem: Choosing trails way beyond your fitness level or experience. The Solution: Start with easier trails and work your way up. There’s no shame in hiking “easy” trails—they can still be incredibly beautiful.
Mistake #2: Ignoring Weather Forecasts
The Problem: Not checking weather or assuming it won’t change. The Solution: Always check forecasts and pack for worst-case scenarios. Mountain weather changes quickly.
Mistake #3: Inadequate Food and Water Planning
The Problem: Running out of fuel or getting dehydrated. The Solution: Always pack more food and water than you think you need. It’s better to carry extra weight than go hungry.
Mistake #4: Poor Group Communication
The Problem: Conflicting expectations about pace, difficulty, or goals. The Solution: Have honest conversations before the trip about everyone’s expectations and limitations.
Mistake #5: Untested Gear
The Problem: Equipment failures or discomfort from new gear. The Solution: Test all gear on shorter hikes first. Break in boots, practice with your stove, and adjust pack fit.
More mistakes to avoid: 10 Common Beginner Hiking Mistakes (And How to Avoid Them)
Frequently Asked Questions About Planning Hiking Trips
How do I plan my first hiking trip as a complete beginner?
Start simple! Choose a well-marked trail under 5 miles with moderate elevation gain. Go with an experienced friend if possible, or join a local hiking group. Pack the 10 essentials, wear comfortable broken-in shoes, and bring plenty of water and snacks. Focus on enjoying the experience rather than conquering difficult peaks.
How many miles should I plan to hike per day?
This depends on your fitness level and the terrain. Most beginners can comfortably handle 5-8 miles on moderate terrain. Experienced hikers might do 10-15 miles. Factor in elevation gain (every 1,000 feet up adds significant difficulty), trail conditions, and weather. It’s better to underestimate and have a pleasant experience than overestimate and suffer.
What gear do I absolutely need for a day hike?
The 10 essentials are non-negotiable: navigation tools, headlamp, first aid kit, knife, fire starter, emergency shelter, extra food, extra water, extra clothes, and sun protection. Beyond that, wear comfortable hiking shoes, bring a day pack, and pack snacks and plenty of water. Don’t overcomplicate it—you can hike with surprisingly little gear.
How far in advance should I plan a hiking trip?
For day hikes to local trails, a week of planning is usually sufficient. For popular national parks or permits required areas, plan 3-6 months ahead. Overnight backpacking trips in wilderness areas often require permits that open exactly 6 months in advance and sell out within hours. The more popular and remote the destination, the more advance planning you’ll need.
Do I need hiking boots or can I wear regular sneakers?
For well-maintained trails under 5 miles, good athletic shoes are often fine. However, hiking boots provide better ankle support, protection from rocks and roots, and better traction on varied terrain. If you’re carrying a heavy pack, hiking on rough terrain, or going more than a few miles, invest in proper hiking footwear. The key is comfort and fit—avoid new shoes on long hikes.
How do I find hiking partners or groups?
Meetup.com: Search for local hiking groups in your area
Facebook groups: Many cities have hiking and outdoor activity groups
REI and outdoor stores: Often host group hikes and classes
Local hiking clubs: Many areas have established hiking organizations
Apps like Bumble BFF: Connect with outdoor-minded people
Coworkers and friends: You’d be surprised who’s interested in hiking
What should I do if I get lost while hiking?
Stop immediately and don’t panic. Use the STOP method: Stop, Think, Observe, Plan. Check your map and try to retrace your steps to the last known landmark. If you have cell service, call for help. If not, stay put and make yourself visible with bright clothing or a signal mirror. Most lost hikers are found within 24 hours, so shelter and warmth are your priorities. For more info check How to Handle Getting Lost on a Hike.
Final Thoughts: Start Planning Your Next Adventure
Planning a hiking trip doesn’t have to be overwhelming or stressful. The key is to start simple, be honest about your abilities, and prioritize safety over ambition. Every experienced hiker started with their first trail, and each trip teaches you something new about the outdoors and yourself.
Remember: the best hiking trip is one where everyone comes home safely with great memories and stories to tell. Whether you’re planning a gentle nature walk or an epic wilderness adventure, this guide gives you the framework to make it happen.
The trails are waiting—now you have everything you need to plan your perfect hiking trip. Start with your local area, build your skills and confidence, and soon you’ll be planning adventures in some of the world’s most beautiful places.
Ready to start planning? Bookmark this guide, share it with your future hiking partners, and begin researching trails in your area. Your next great adventure is just a plan away!
Related Hiking Resources
- Ultimate Budget Hiking Gear Checklist: Budget Hiking: How to Gear Up Without Breaking the Bank
- Hiking Safety Guide: Bear Safety, First Aid for Hikers, 6 Survival tips for Solo Hikers
- Backpacking for Beginners: How to Start Hiking: A Beginner’s 12 Step Guide
- National Park Hiking Guide: 10 America’s Most Iconic Day Hikes Every Hiker Should Try in the US
- Full hiking gear guide: The Ultimate Hiking Gear Guide 2026: What You Actually Need (Tested & Approved)
Ready to explore more hiking content? Check out our complete collection of hiking guides and trail recommendations!
Leave a Reply