Last updated: February 2026
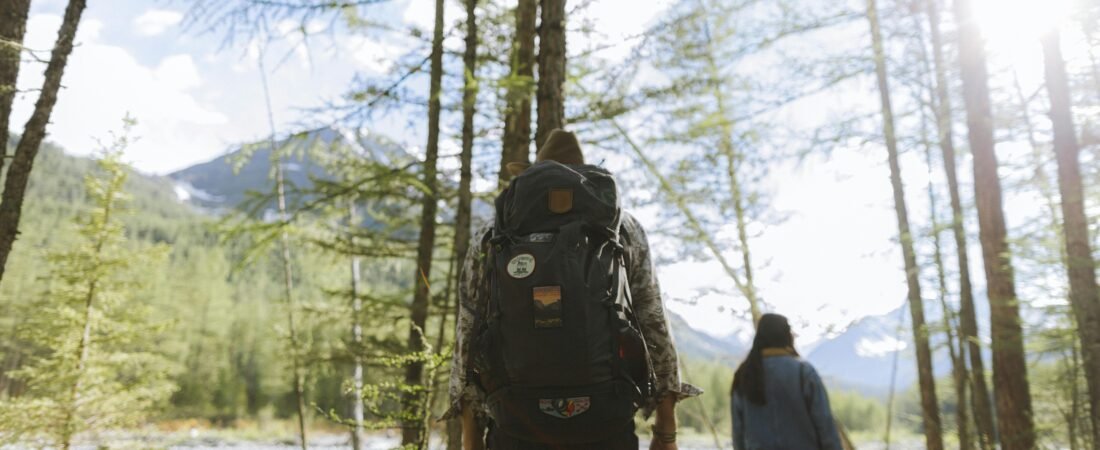
If you’ve been scrolling through Instagram, mesmerized by those breath-taking mountain vistas and wondering “how do I start hiking?” – you’re in the right place. The truth is, hiking for beginners isn’t as intimidating as it might seem. You don’t need to be a fitness guru or own thousands of dollars worth of gear to hit the trails.
I remember my first hike like it was yesterday. I wore old sneakers, packed way too much water (and pretty much everything else), and chose a trail that nearly broke me. But despite the mistakes, something magical happened out there among the trees and rocks. That connection with nature, the sense of accomplishment, the fresh air filling my lungs – it was addictive. And I learned I am not the only one who had similar experience!
Whether you’re looking to escape the office, doom-scrolling, get some exercise, or simply try something new, this comprehensive guide will walk you through everything you need to know about starting your hiking journey safely and confidently.
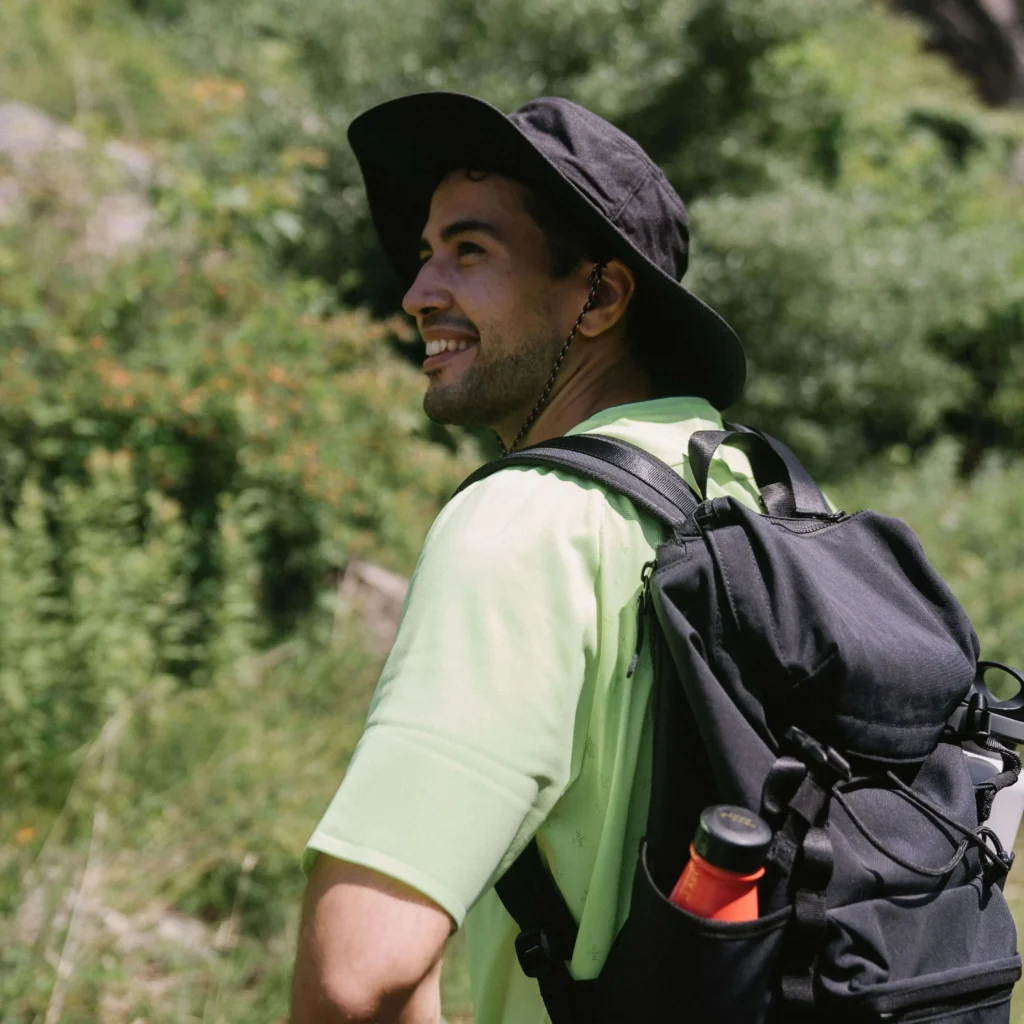
Table of Contents
*This post may contain affiliate links. If you use them, I may earn a small commission at no extra cost to you.
Why Start Hiking? The Life-Changing Benefits
Before we dive into the how-to’s, let’s talk about why hiking is worth your time. Beyond the obvious Instagram-worthy photos, hiking offers incredible benefits:
- Physical Health Benefits:
- Strengthens your heart and lungs
- Builds leg and core strength
- Improves balance and coordination
- Burns 400-700 calories per hour
- Reduces blood pressure and cholesterol
- Improves bone density through weight-bearing
- Mental Health Benefits:
- Reduces stress and anxiety
- Improves mood and self-esteem
- Enhances creativity and problem-solving
- Provides digital detox opportunities
- Creates a sense of achievement
- Social and Lifestyle Benefits:
- Connects you with like-minded people
- Encourages family bonding time
- Develops outdoor skills and confidence
- Creates lasting memories and stories
Step 1: Assess Your Current Fitness Level Honestly
Here’s the thing nobody talks about: your first hike shouldn’t be Mount Everest. The same way your first run shouldn’t be Ironman. I’ve seen too many eager beginners bite off more than they can chew, only to end up exhausted, defeated, or sometimes even injured.
Quick Fitness Self-Assessment:
- Can you walk for 30 minutes without getting winded?
- Do you regularly engage in any physical activity?
- Have you done any hiking or backpacking before?
- Do you have any health conditions or injuries?
If you’re starting from zero fitness:
Begin with flat, paved trails or nature walks. Build up your endurance with 20-30 minute walks several times a week before attempting actual hiking trails.
If you’re moderately active:
You can probably handle beginner trails under 3 miles with minimal elevation gain.
If you’re already fit:
You might be ready for longer or more challenging trails, but don’t skip the other preparation steps.
Step 2: Find Your First Trail (The Right Way)
Choosing your first hiking trail is crucial. Too easy, and you might be bored or uninspired. Too hard, and you might never want to hike again. Here’s how to find that sweet spot:
Beginner-Friendly Trail Characteristics:
- Distance: 2-5 miles total
- Elevation gain: Less than 500 feet
- Trail type: Well-maintained, clearly marked
- Difficulty rating: Easy to moderate
- Loop vs. out-and-back: Either works, but loops offer more variety
- Crowds: Popular trails are better for beginners (safety in numbers)
Yes, these are all subjective, but if you already know your level, and these seem too easy, you may not be a beginner and you might just be wasting your time reading this article. You might want to look at some of the toughest hikes instead.
Check Hiking difficulty Calculator: Find Your Perfect Trail Difficulty
For start, I suggest focusing on a day hike. A hike where you set-out ant come back the same day. More details on day hikes: Day Hiking 101: Planning, Gear, and Trail Etiquette for success.
Best Resources for Finding Trails:
- AllTrails (Most Popular):
- Detailed trail maps and reviews
- Photos from recent hikers
- GPS tracking capabilities
- Difficulty ratings and stats
- Download offline maps
Local Resources:
- State park websites
- National forest service sites
- Local hiking clubs and groups
- REI store recommendations
- Visitor centers and ranger stations
What to Look for in Trail Reviews:
- Recent trip reports (within 3 months)
- Current trail conditions
- Parking availability
- Water sources or restroom locations
- Any special permits required
My Top 3 Beginner Trail Recommendations by Region:
West Coast:
- Rattlesnake Lake Trail (Washington) – 4.3 miles, gentle
- Fern Canyon Loop (California) – 1.5 miles, unique scenery
- Silver Falls Trail (Oregon) – 7.2 miles, but can be shortened
East Coast:
- Bear Mountain Loop (New York) – 3.8 miles, great views
- Old Rag Circuit (Virginia) – can be modified for beginners
- Cascade Falls Trail (Virginia) – 2.4 miles, waterfall payoff
Midwest:
- ahquamenon Falls (Michigan) – 4 miles, stunning waterfalls
- Starved Rock State Park trails (Illinois) – various options
- Pictured Rocks (Michigan) – multiple beginner sections
More on choosing the right hike: How to Choose the Right Hiking Trail for Your Fitness Level (2025 Guide)
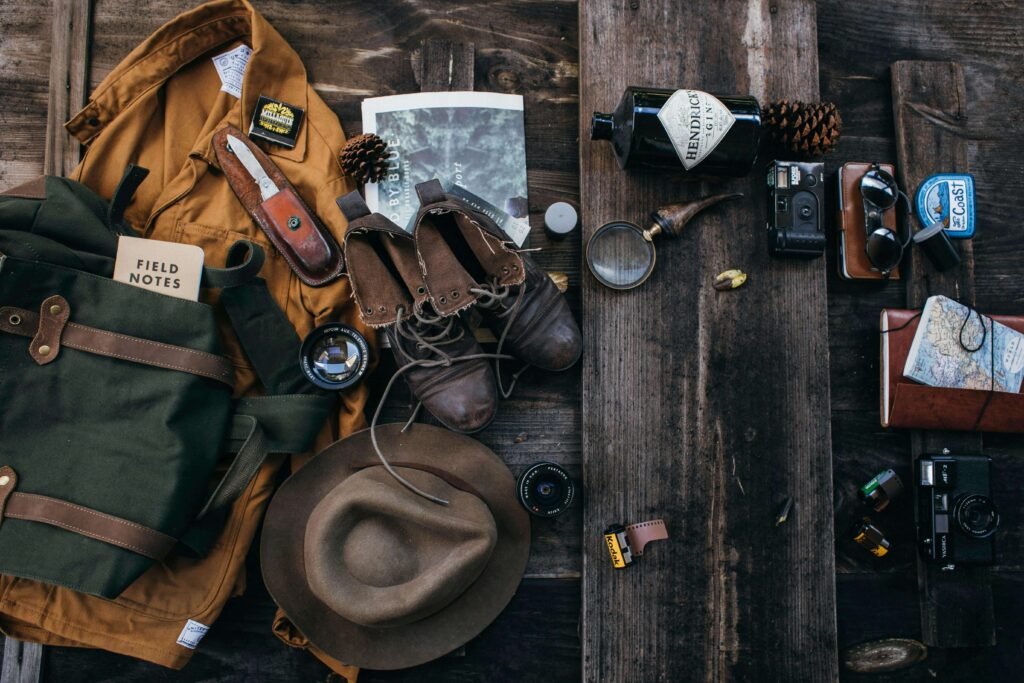
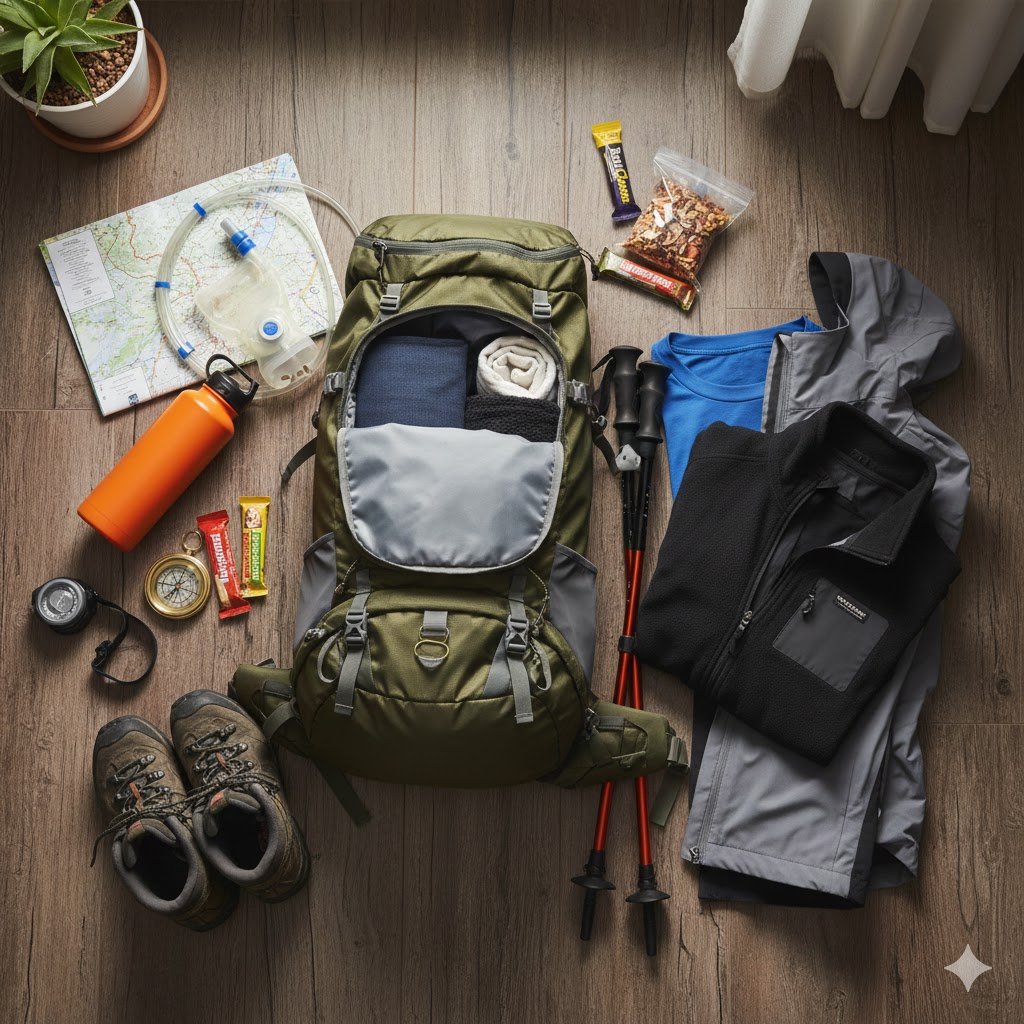
Step 3: Essential Gear for Beginner Hikers
By far the biggest mistakes new hikers make is either over-packing or under-packing. You don’t need to spend a fortune, but having the right basics makes a loooot of the difference. Also, if you want a more in depth dive into hiking gear, check The Ultimate Hiking Gear Guide. What You Actually Need.
The Must-Have Essentials (Don’t Skip These):
- Navigation:
- Phone with offline maps downloaded
- Physical map of the area (backup)
- Compass (and know basic usage)
- Sun Protection:
- Sunscreen (SPF 30+)
- Sunglasses
- Hat with brim
- Insulation/Extra Clothing:
- Extra layer (even on warm days)
- Rain jacket or poncho • Extra socks
- Illumination:
- Headlamp or flashlight
- Extra batteries
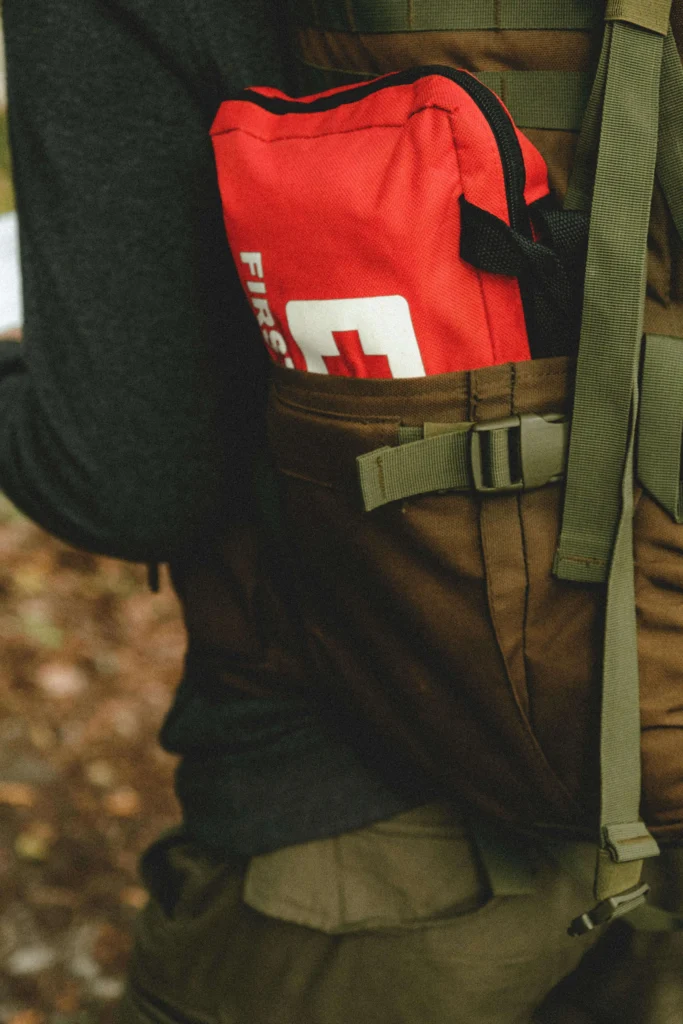
- First Aid:
- Basic first aid kit. (e.g. Mini First Aid Kit)
- Personal medications
- Blister treatment
- Fire:
- Waterproof matches or lighter
- Fire starter
- Repair Tools:
- Duct tape
- Multi-tool or knife
- Nutrition:
- Extra food beyond what you plan to eat
- High-energy snacks
- Hydration:
- More water than you think you need
- Water purification method for longer hikes
- Emergency Shelter:
- Emergency blanket or bivy
Footwear: Your Most Important Decision
Hiking means your feet carry you all the way, literally, so yes, they need to be comfortable and supported. Here’s what works:
Best Options for Beginners:
- Trail running shoes: Lightweight, comfortable, good for most terrain. A few good beginner picks are the Altra Lone Peak 7 and Salomon Sense Ride. Both are trail-tested and beginner-approved.
- Hiking shoes (low-cut): More durable than sneakers, still comfortable. For example – Merrell Moab 3
- Hiking boots (high-cut): Best for rocky terrain and ankle support. A good, safe option – Salomon Men’s X Ultra
What to Avoid:
- Brand new shoes (recipe for blisters)
- Cotton socks (they stay wet and cause blisters)
- Fashion sneakers or casual shoes
More on hiking footwear: Hiking Footwear Guide: Best Trail Runners vs Hiking Boots vs Hiking Shoes
Sock Recommendations:
- Merino wool or synthetic blend (Darn Tough, Smartwool)
- Avoid cotton at all costs
- Consider liner socks under hiking socks for blister prevention
Clothing That Works:
- Base Layer (Next to Skin):
Moisture-wicking synthetic or merino wool
Never cotton (it kills in cold, wet conditions)
e.g Icebraker Merino - Hiking Layer:
Lightweight, quick-dry pants or shorts
Long sleeves for sun protection
Breathable, stretchy fabrics - Insulation Layer:
Fleece or down jacket for warmth
Easy to pack and unpack - Shell Layer:
Waterproof/breathable rain jacket
Essential even on sunny days
Read How to Layer Clothes for Hiking: The Complete Guide to Staying Comfortable in Any Weather
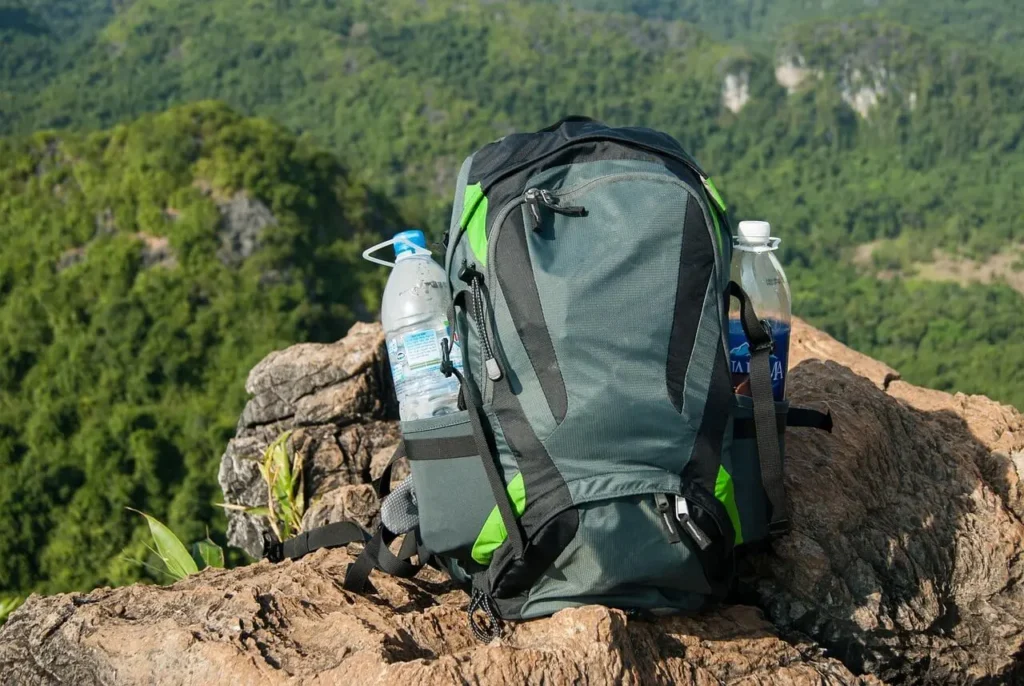
Backpack Basics:
For Day Hikes:
- 20-30 litre capacity
- Comfortable shoulder straps
- Hip belt for longer hikes
- Hydration compatible
Must-Have Features:
- External pockets for water bottles
- Side compression straps
- Comfortable back panel
- Reflective elements for safety
Few recommendations: Osprey Ultralight, Maelstrom.
Hiking in summer vs winter differ dramatically, so if you’re hiking in hot weather check: Hot weather hiking: How to Survive Hiking in Summer
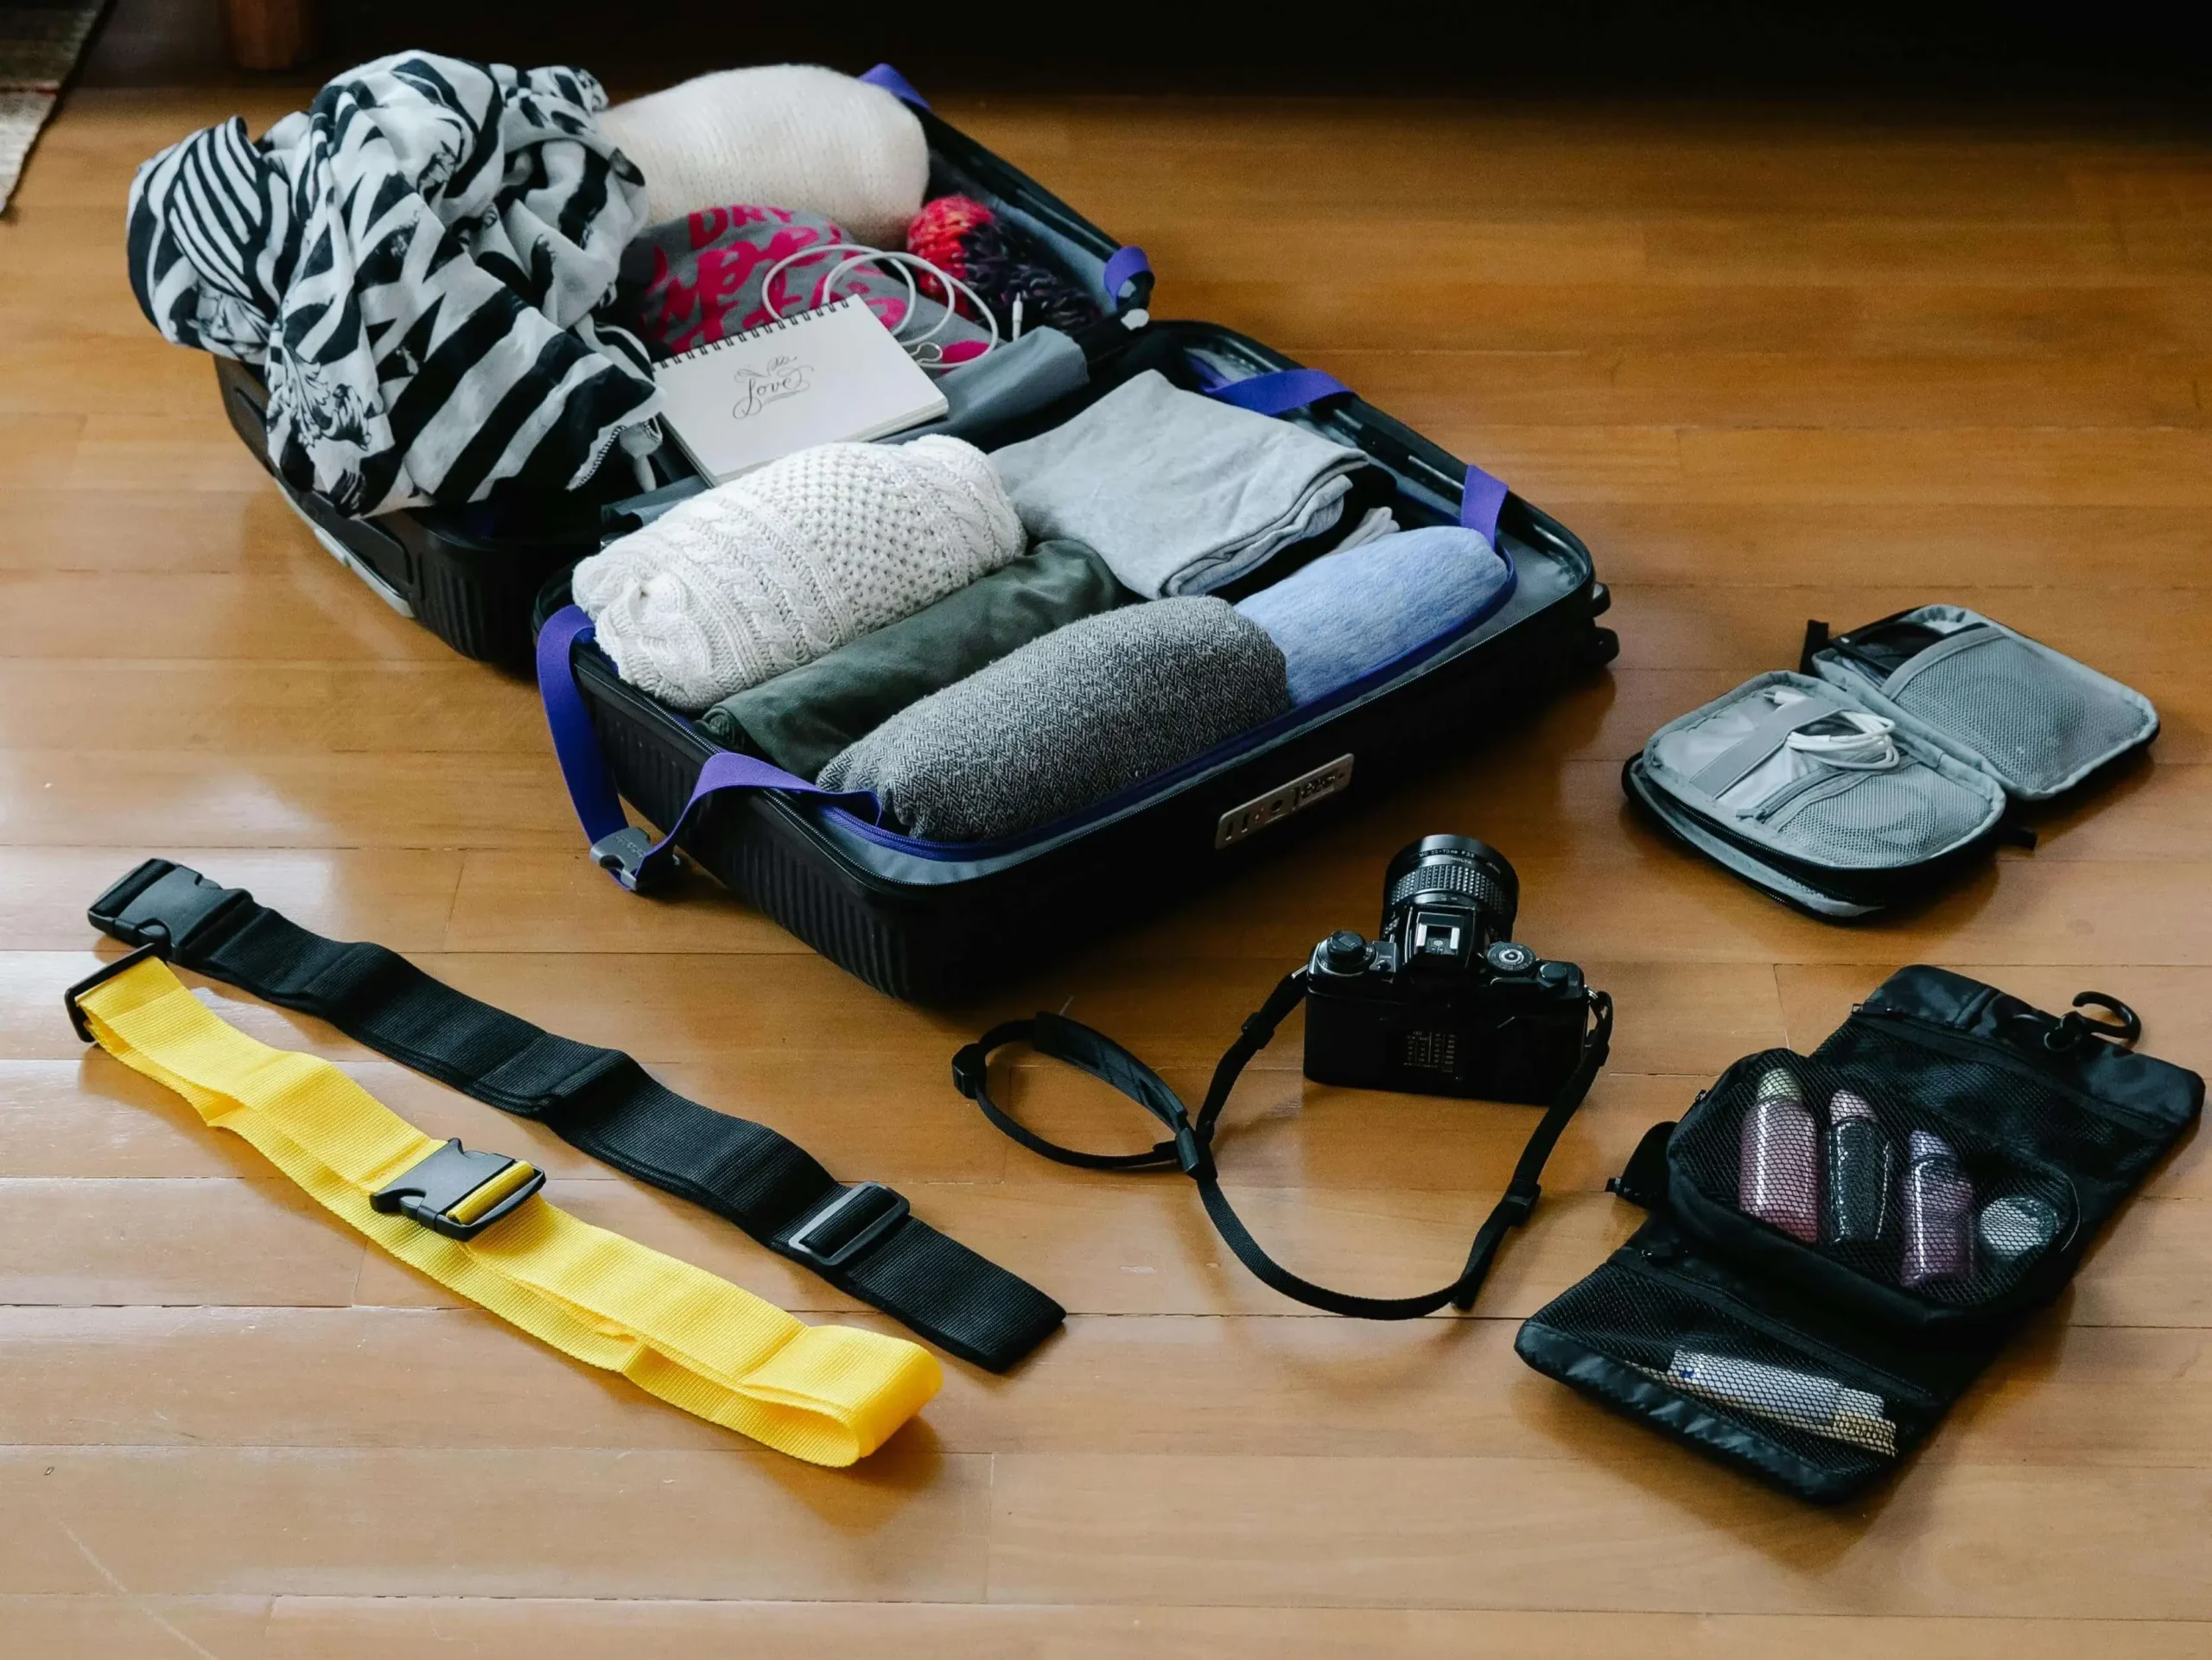
Step 4: Plan Your First Hike Like a Pro
Planning separates successful hikers from those who end up as cautionary tales. Here’s your pre-hike checklist:
Research Phase (Do This 2-3 Days Before):
Check Trail Conditions:
- Recent trip reports
- Weather forecast for the area
- Trail closures or construction
- Permit requirements
- Parking fees or passes needed
Timing Considerations:
- Sunrise and sunset times
- Peak crowd times (usually 10am-2pm)
- Weather windows
- Your personal energy patterns
Route Planning:
- Study the trail map
- Identify key landmarks and junctions
- Plan rest stops and turnaround points
- Note emergency exit routes
Day-Before Preparation:
Gear Check:
- Pack everything the night before
- Test electronics and charge batteries
- Check weather forecast again
- Prepare snacks and meals
Physical Prep:
- Get a good night’s sleep
- Hydrate well
- Eat a nutritious dinner
- Stretch or do light exercise
Communication:
- Tell someone your exact plans
- Share your expected return time
- Leave a note in your car (not visible to thieves)
- Consider a check-in schedule for longer hikes
Day-Of Success Tips:
- Start Early:
- Hit the trail by 7-8am if possible
- Avoid crowds and heat
- More time for unexpected delays
- Better parking availability
- Final Checks:
- Weather conditions
- Trail status updates
- Emergency contacts informed
- All gear packed and ready
More on day hike preparation: Day Hiking 101: Planning, Gear, and Trail Etiquette for success, How to Plan a Hiking Trip: Complete 2025 Guide for Excited Beginners & Experts
Step 5: Master Basic Hiking Navigation
Getting lost is scary, but it’s also completely preventable with basic navigation skills. Here’s what every beginner needs to know:
Phone-Based Navigation:
Essential Apps: AllTrails (most user-friendly), Gaia GPS (more advanced features), Offline Maps (Google Maps works too)
Phone Setup Tips: Download offline maps before you go, Put phone in airplane mode to save battery, Keep GPS/location services on, Bring a portable battery pack
Map and Compass Basics:
Why Paper Maps Matter: Phones die, get wet, or break, Bigger picture of the area, No battery required, Essential backup navigation.
Basic Compass Skills: Identify magnetic north, Understand declination in your area, Practice taking and following bearings, Learn to triangulate your position
More on the topic: How to Read a Trail Map and Navigate Without Getting Lost

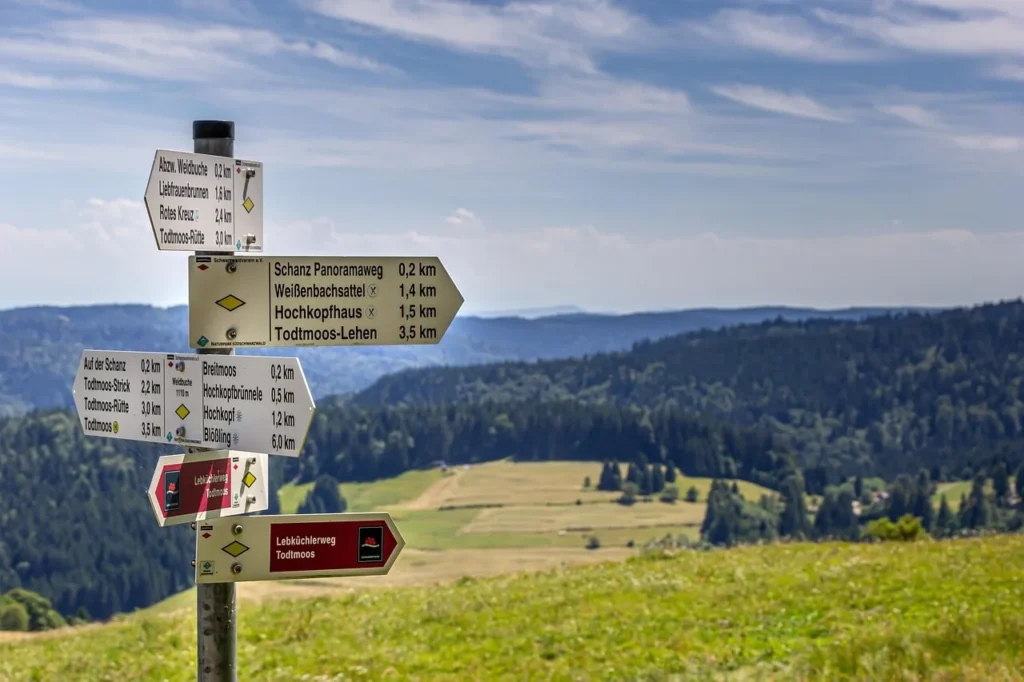
Trail Markers and Signs:
What to Look For:
- Blazes (painted marks on trees)
- Trail signs at junctions
- Mileage markers
- Directional arrows
Stay Found Strategies:
- Turn around periodically to see what the trail looks like going back
- Take photos at key junctions
- Count your steps on unmarked sections
- Trust your map over your instincts
How to Handle Getting Lost on a Hike
Step 6: Learn Proper Hiking Technique – Tips
Believe it or not, there’s more to hiking than just walking. Good technique prevents injuries and conserves energy.
Efficient Walking Form:
Uphill Techniques:
- Shorten your stride
- Use the “rest step” (pause with weight on back leg)
- Switch back and forth across switchbacks
- Use trekking poles for extra power
Downhill Techniques:
- Take shorter steps to maintain control
- Keep knees slightly bent
- Use trekking poles to reduce knee impact
- Don’t lean back too far
Level Ground:
- Maintain a steady, comfortable pace
- Swing arms naturally
- Look ahead, not just at your feet
- Take breaks before you’re exhausted
Pacing and Energy Management:
The “Talk Test”: You should be able to hold a conversation. If you’re gasping, slow down. It’s not a race – consistent pace wins
Rest Break Strategy: Short breaks (5-10 minutes) every hour. Longer break (20-30 minutes) halfway through. Eat and drink something at each break. Use breaks to check navigation and adjust gear.
Step 7: Safety Fundamentals Every Beginner Must Know
Safety isn’t just about avoiding bears (though that one’s important too). Most hiking injuries are preventable with knowledge and preparation.
Weather Awareness:
Before You Go:
- Check multiple weather sources
- Look at mountain/elevation-specific forecasts
- Understand how weather affects your chosen trail
- Have a backup plan for bad weather
On the Trail:
- Monitor changing conditions
- Know signs of dangerous weather
- Turn back if conditions deteriorate
- Seek shelter during lightning storms (If possible not under a tree)
Wildlife Safety:
General Principles:
- Make noise to avoid surprising animals
- Keep food properly stored
- Never feed wildlife
- Give all animals plenty of space
Bear Country Basics:
- Carry bear spray and know how to use it
- Make noise on blind corners
- If you see a bear, don’t run
- Back away slowly while facing the bear
Other Wildlife Concerns:
- Snakes: Watch where you step and place hands
- Mountain lions: Maintain eye contact, appear large
- Insects: Use repellent, check for ticks
Injury Prevention and Treatment:
Most Common Hiking Injuries:
- Blisters (prevention is key)
- Twisted ankles (watch your footing)
- Cuts and scrapes (first aid basics)
- Dehydration and heat exhaustion
- Hypothermia (even in summer)
Basic First Aid Skills:
- How to treat blisters
- Sprain assessment and care
- Signs of heat illness
- When to call for help
First Aid for Hikers: Essential Trail Safety Guide (What to Pack + How to Use It)
Emergency Protocols:
If You Get Lost:
- STOP – don’t panic
- Stay where you are
- Retrace your steps if you’re sure of the route
- Signal for help (whistle, bright clothing, mirror)
- Conserve energy and warmth
How to Handle Getting Lost on a Hike
Emergency Communication:
- Cell phone (if signal available)
- Personal locator beacon (PLB) for remote areas
- Whistle (three sharp blasts is universal distress signal)
- Signal mirror or bright clothing
Step 8: Trail Etiquette and Leave No Trace
Being a good trail citizen ensures that hiking opportunities remain available for everyone. These aren’t just suggestions – they’re essential practices.
Right of Way Rules:
Basic Hierarchy:
- Hikers yield to horses
- Bikers yield to hikers and horses
- Downhill hikers yield to uphill hikers
- Everyone yields to common sense and safety
Best practices:
- Step to the downhill side when yielding
- Communicate with other trail users
- Be patient and courteous
- Help others when appropriate
Leave No Trace Principles:
- Plan Ahead and Prepare:
- Research regulations and special concerns
- Prepare for extreme weather and emergencies
- Schedule your trip to avoid times of high use
- Visit in small groups
- Travel and Camp on Durable Surfaces:
- Stay on designated trails
- Don’t cut switchbacks
- Camp only in designated areas
- Keep campsites small
- Dispose of Waste Properly:
- Pack out all trash, leftover food, and litter
- Deposit solid human waste in catholes 6-8 inches deep
- Pack out toilet paper and hygiene products
- Wash yourself and dishes 200 feet from water
- Leave What You Find:
- Preserve the past – don’t touch cultural or historic structures
- Leave rocks, plants, and other natural objects as you found them
- Avoid introducing or transporting non-native species
- Don’t build structures or furniture
- Minimize Campfire Impacts:
- Use established fire rings, fire pans, or mound fires
- Keep fires small and burn only sticks from the ground
- Burn all wood and coals to ash, put out completely, scatter cool ashes
- Consider using a lightweight stove instead
- Respect Wildlife:
- Observe wildlife from a distance
- Never feed animals
- Protect wildlife and your food by storing rations securely
- Control pets at all times, or leave them at home
- Be Considerate of Other Visitors:
- Respect other visitors and protect quality of their experience
- Be courteous, yield to other users on the trail
- Take breaks and camp away from trails and other visitors
- Let nature’s sounds prevail; avoid loud voices and noises
If you are hiking with a dog, check Hiking with Dogs: Trail Etiquette, Gear, and Safety
Step 9: Build Your Hiking Fitness Gradually
Hiking fitness is different from gym fitness. Here’s how to build the specific strength and endurance you need:
Pre-Hiking Training (4-6 Weeks Before):
Cardio Base Building:
- Walking: Start with 30 minutes, build to 60 minutes
- Hiking stairs or hills in your neighborhood
- Stationary bike or elliptical for joint-friendly options
- Swimming for full-body, low-impact conditioning
Strength Training Focus Areas:
- Legs: Squats, lunges, calf raises, step-ups
- Core: Planks, mountain climbers, Russian twists
- Balance: Single-leg stands, balance board exercises
- Functional movements: Deadlifts, farmer’s walks
Flexibility and Mobility:
- Daily stretching routine
- Focus on hip flexors, calves, and IT bands
- Yoga for hikers
- Foam rolling for recovery
Progressive Training Plan:
Weeks 1-2: Foundation • 20-30 minute walks, 3-4 times per week • Basic bodyweight exercises • Focus on consistency over intensity
Weeks 3-4: Building • 30-45 minute walks with hills • Add weight to backpack (start with 5-10 lbs) • Increase strength training frequency
Weeks 5-6: Specificity • 45-60 minute hikes on actual trails • Heavier pack weight (10-15 lbs) • Practice with your actual hiking gear
On-Trail Fitness Development:
Progressive Distance Goals: • Week 1: 2-3 miles • Week 2: 3-4 miles • Week 3: 4-5 miles • Week 4: 5-6 miles • Continue adding 1-2 miles per week
Elevation Training: • Start with less than 200 feet elevation gain • Add 100-200 feet each week • Focus on uphill/downhill technique • Build specific muscle memory
How to Train for Hiking? a Long-Distance and Elevation-Heavy Hike Complete 2025 Guide
Step 10: Nutrition and Hydration for Hikers
What you eat and drink is important in general, but infinitely more on a hike. Here’s how to fuel properly:
Hydration Strategy:
How Much Water:
- 16-32 oz(0.5-1L) per hour of hiking (varies by conditions)
- More in hot weather or high altitude
- Start hydrating 24 hours before your hike
- Monitor urine color (pale yellow is ideal)
more on hydration: Hiking Hydration Guide: How Much Water Do You Need on the Trail?
Electrolyte Balance:
- Add electrolyte tablets or powder for longer hikes
- Eat salty snacks to replace sodium
- Avoid overhydrating (can be dangerous)
- Consider sports drinks for extended efforts
Water Sources on Trail:
- Research water availability beforehand
- Carry purification tablets or filter (like LifeStraw or Sawyer Mini)
- Never drink untreated water from natural sources
- Plan refill points on longer hikes
Trail Food Strategy:
Pre-Hike Meal (2-3 Hours Before):
- Complex carbohydrates for sustained energy
- Moderate protein
- Avoid high-fat or high-fiber foods
- Examples: oatmeal with fruit, whole grain toast with peanut butter
During-Hike Snacks:
- 200-300 calories per hour of hiking
- Mix of carbs, protein, and healthy fats
- Easy to eat and digest
- Non-perishable and packable
Great Trail Snacks:
- Trail mix (nuts, dried fruit, dark chocolate)
- Energy bars or granola bars • Fresh fruit (apples, bananas)
- Jerky or meat sticks
- Crackers and cheese
- Nut butter packets
Need recommendations? The Ultimate Guide to the Best Trail Snacks: 10 Nutritious Options Ranked by Hikers
Post-Hike Recovery:
- Eat within 30 minutes if possible
- Combine protein and carbohydrates
- Rehydrate with water and electrolytes
- Examples: chocolate milk, recovery smoothie, turkey sandwich
Special Dietary Considerations:
Vegetarian/Vegan Hikers:
- Focus on plant-based proteins
- Nuts, seeds, and legume-based snacks
- Consider B12 and iron supplementation
- Pack diverse options to avoid flavor fatigue
Diabetes Management:
- Monitor blood sugar more frequently
- Pack fast-acting carbohydrates
- Adjust insulin for increased activity
- Carry glucose tablets or gel
Food Allergies:
- Read all labels carefully
- Pack safe alternatives
- Inform hiking partners of allergies
- Carry emergency medication (EpiPen)
Don’t forget food safety, check How to Safely Store Food and Carry it While Hiking?
Also read: Hiking Nutrition: What to Eat Before, During & After for Best Performance
Step 11: Seasonal Hiking Considerations
Each season brings unique opportunities and challenges. Here’s how to adapt your approach:
Spring Hiking:
Advantages:
- Mild temperatures
- Wildflowers and fresh growth
- Fewer crowds than summer
- Longer daylight hours returning
Challenges:
- Muddy and wet trails
- River crossings may be dangerous
- Weather can be unpredictable
- Some high-elevation trails still snow-covered
Spring-Specific Gear:
- Waterproof boots or gaiters
- Extra layers for temperature swings
- Trekking poles for muddy sections
- Updated trail condition information
Summer Hiking:
Advantages:
- All trails typically open
- Longest daylight hours
- Warmest weather
- Peak wildflower season in mountains
Challenges:
- Crowded trails and parking
- Heat-related illness risk
- Afternoon thunderstorms
- Fire restrictions in many areas
More on summer hiking: Hot weather hiking: How to Survive Hiking in Summer
Summer-Specific Strategies:
- Start very early (sunrise or before)
- Carry extra water
- Plan for shade and rest breaks
- Check fire restrictions and air quality
Fall Hiking:
Advantages:
- Beautiful autumn colors
- Comfortable temperatures
- Fewer bugs
- Crisp, clear air
Challenges:
- Shorter daylight hours
- Weather can change quickly
- Wet leaves make trails slippery
- Hunting season in some areas
Fall-Specific Preparations:
- Check hunting seasons and wear bright colors
- Bring extra layers for temperature drops
- Start earlier due to shorter days
- Be extra careful on leaf-covered trails
Winter Hiking:
Advantages:
- Peaceful, quiet trails
- Beautiful snow-covered landscapes
- Excellent fitness challenge
- Fewer crowds
Challenges:
- Cold weather risks (hypothermia, frostbite)
- Snow and ice require special gear
- Much shorter daylight hours
- Emergency rescue is more difficult
Winter-Specific Requirements:
- Microspikes or snowshoes
- Insulated, waterproof boots
- Multiple clothing layers
- Emergency shelter and warmth
- Headlamp essential
- Knowledge of winter survival skills
More on winter hiking: Your Complete Guide to Gear, Safety, and Cold Weather Hikes
Step 12: Common Beginner Mistakes to Avoid
Learning from others’ mistakes is much less painful than making them yourself. Here are the big ones:
Planning and Preparation Mistakes:
Overambitious First Hikes:
- Choosing trails too long or difficult
- Not researching trail conditions
- Ignoring weather forecasts
- Failing to tell anyone their plans
Solution: Start conservatively and build up gradually. It’s better to finish a shorter hike wanting more than to suffer through one that’s too difficult.
Gear and Clothing Errors:
Cotton Clothing:
- “Cotton kills” in cold, wet conditions
- Takes forever to dry
- Provides no insulation when wet
- Causes chafing when sweaty
New Gear on Trail:
- Wearing new boots (hello, blisters!)
- Testing new equipment for first time
- Not practicing with gear beforehand
Solution: Test all new gear on shorter, easier hikes first. Break in boots gradually over weeks.
Navigation and Safety Issues:
Over-Reliance on Phone GPS:
- Batteries die at worst possible moment
- No cell service in many hiking areas
- Screens hard to see in bright sunlight
- Easy to drop and break
Solution: Always carry paper map and compass as backup. Learn basic navigation skills.
Physical Preparation Oversights:
Inadequate Training:
- Jumping into long hikes without preparation
- Ignoring specific hiking fitness needs
- Not building up pack weight gradually
Poor Pacing:
- Starting too fast and burning out
- Not taking regular breaks
- Pushing through pain instead of listening to body
Solution: Build fitness gradually and listen to your body. Hiking should be challenging but enjoyable.
Nutrition and Hydration Mistakes:
Not Drinking Enough:
- Waiting until thirsty to drink
- Underestimating water needs
- Not replacing electrolytes on long hikes
Poor Food Choices:
- Not eating enough calories
- Bringing foods that don’t travel well
- Forgetting emergency backup food
Solution: Drink regularly whether thirsty or not. Pack more food and water than you think you need.
More on hydration: Hiking Hydration Guide: How Much Water Do I Need on the Trail?
Another in-depth checklist: 10 Common Beginner Hiking Mistakes
Advanced Tips for Progressing Beyond Beginner Level
Once you’ve mastered the basics, here’s how to safely advance your hiking skills:
Building Technical Skills:
Route Finding:
- Practice off-trail navigation in safe areas
- Learn to read topographic maps fluently
- Understand GPS coordinates and waypoints
- Practice triangulation with map and compass
Advanced Gear Usage:
- Trekking poles techniques for different terrain
- Layering systems for variable conditions
- Efficient packing and weight distribution
- Gear maintenance and field repairs
Expanding Your Hiking Horizons:
Different Trail Types:
- Desert hiking techniques and considerations
- High-altitude hiking and acclimatization
- Coastal and beach hiking
- Urban hiking and city trail systems
Seasonal Specialization:
- Winter hiking and snowshoeing
- Spring wildflower and waterfall hikes
- Summer high-altitude adventures
- Fall foliage and cooler weather hiking
Distance Progression:
- Building up to 10+ mile day hikes
- Multi-day backpacking preparation
- Thru-hiking section preparation
- Ultra-light hiking techniques
Joining the Hiking Community:
Local Groups and Clubs:
- Meetup hiking groups
- Sierra Club outings
- REI classes and events
- Trail maintenance volunteer opportunities
Online Communities:
- Hiking forums and Facebook groups
- Instagram hiking accounts for inspiration
- YouTube channels for technique tutorials
- Hiking blogs and websites for destination ideas
Sharing Your Experience:
- Trail reports and reviews
- Photography and social media sharing
- Mentoring newer hikers
- Trail stewardship and conservation
Troubleshooting Common Hiking Problems
Even experienced hikers face challenges. Here’s how to handle common issues:
Physical Discomfort:
Blisters:
- Prevention: proper-fitting shoes, moisture-wicking socks
- Early treatment: moleskin at first hot spot
- Care: don’t pop unless absolutely necessary
- Recovery: keep clean and dry
Sore Muscles:
- Prevention: adequate training and warm-up
- During hike: adjust pace, stretch, rest
- Recovery: gentle stretching, hydration, nutrition
- When to worry: severe pain or inability to move
Chafing:
- Prevention: moisture-wicking clothing, anti-chafe products
- Treatment: clean and dry area, apply barrier cream
- Avoid: cotton clothing, seams in wrong places
Environmental Challenges:
Bad Weather:
- Rain: proper rain gear, adjust plans if necessary
- Heat: start early, seek shade, increase water intake
- Cold: layer appropriately, watch for hypothermia signs
- Wind: secure all gear, consider eye protection
Difficult Terrain:
- Rocky trails: watch foot placement, use trekking poles
- Muddy conditions: waterproof boots, accept getting dirty
- Stream crossings: assess safety, use poles for balance
- Steep sections: take your time, rest frequently
Motivation and Mental Challenges:
Loss of Motivation:
- Remember why you started hiking
- Set small, achievable goals
- Hike with others for accountability
- Try new trails and locations
Fear and Anxiety:
- Start with familiar, easy trails
- Hike with experienced partners
- Take a wilderness first aid class
- Practice emergency procedures
Feeling Overwhelmed:
- Break big goals into smaller steps
- Focus on one skill at a time
- Don’t compare yourself to others
- Celebrate small victories
Building Your Hiking Community
Hiking doesn’t have to be a solo activity. Building connections enhances safety, learning, and enjoyment:
Finding Hiking Partners:
Online Platforms:
- Meetup.com hiking groups
- Facebook local hiking communities
- Reddit hiking subreddits for your area
- AllTrails community features
Offline Opportunities:
- REI and outdoor gear store events
- Local running and fitness clubs
- Workplace outdoor groups
- College alumni outdoor clubs
Hiking Club Benefits:
- Experienced leaders for guidance
- Group safety on challenging trails
- Shared transportation to trailheads
- Social connections and friendships
Contributing to the Community:
Trail Maintenance:
- Volunteer with local trail organizations
- Participate in National Trails Day events
- Adopt-a-trail programs
- Report trail conditions and hazards
Knowledge Sharing:
- Write trail reviews and reports
- Share photos and experiences responsibly
- Mentor new hikers
- Teach outdoor skills workshops
Conservation Efforts:
- Support land conservation organizations
- Practice and promote Leave No Trace
- Participate in citizen science projects
- Advocate for trail funding and protection
Your First Year of Hiking: A Month-by-Month Plan
Here’s a realistic progression plan for your first year of hiking:
Months 1-2: Foundation Building
- Goal: Complete 3-5 short hikes (2-4 miles)
- Focus: Basic gear, fitness building, navigation skills
- Key Learning: Trail etiquette, safety basics, gear usage
- Milestone: Comfortable with day hiking essentials
Months 3-4: Skill Development
- Goal: Tackle 5-8 moderate hikes (4-6 miles, 500+ ft elevation)
- Focus: Weather adaptations, seasonal considerations
- Key Learning: Advanced navigation, emergency procedures
- Milestone: Confident on various terrain types
Months 5-6: Distance Building
- Goal: Complete 6-10 longer hikes (6-8 miles)
- Focus: Endurance, nutrition strategies, pacing
- Key Learning: Multi-season hiking, gear refinement
- Milestone: All-day hiking comfort
Months 7-8: Challenge Introduction
- Goal: Attempt 3-5 challenging hikes (8+ miles or significant elevation)
- Focus: Technical skills, advanced planning
- Key Learning: Risk assessment, emergency preparedness
- Milestone: Confidence on difficult terrain
Months 9-10: Specialization
- Goal: Explore specific interests (photography, peak bagging, etc.)
- Focus: Advanced techniques, leadership skills
- Key Learning: Trip planning, route finding
- Milestone: Helping other beginners
Months 11-12: Integration
- Goal: Plan and execute a multi-day adventure
- Focus: Backpacking preparation or long-distance hiking
- Key Learning: Logistics, advanced camping skills
- Milestone: Transition from beginner to intermediate hiker
Conclusion: Your Hiking Journey Starts Now!
Starting your hiking journey might feel overwhelming, but remember – every expert was once a beginner. The trail doesn’t discriminate based on age, fitness level, or experience. What matters is your willingness to learn, prepare, and respect the outdoors. So, do you feel that you are ready to start hiking? I sure hope so!
Your first hike doesn’t need to be perfect. You don’t need the most expensive gear or the fittest body. You just need curiosity, preparation, and respect for nature and fellow hikers.
- Key Takeaways for Beginning Hikers:
- Start small and build gradually
- Preparation prevents most problems
- Safety always comes first
- The hiking community is welcoming and helpful
- Every hike teaches you something new
- The journey is more important than the destination
Your Next Steps:
- Choose your first trail using the criteria we discussed
- Gather your essential gear (don’t overthink it)
- Check the weather and inform someone of your plans
- Start early and hike at your own pace
- Take photos, but also take moments to just be present
- Come back and share your experience
Remember, hiking isn’t about conquering mountains or posting the perfect Instagram photo. It’s about connecting with nature, challenging yourself, and finding peace away from the noise of daily life. Every step you take on the trail is a step toward better physical health, mental clarity, and a deeper appreciation for the natural world.
The trails are waiting. Your hiking boots are calling. The only question left is: which adventure will you choose first?
Ready to take the next step? Bookmark this guide, pick a trail, and start planning your first hiking adventure today. The trail community welcomes you with open arms, and I can’t wait to hear about your first hiking success story.
Hope this inspires you to start hiking! Happy trails, and see you out there!
Did I leave somthing out? Are you curiuos about a different outdoors related topic? Leave a comment below or contact me directly and I’ll add the answers to help other beginners!

Leave a Reply