Last updated: January 2026
Whether you’re braving a chilly summit or sweating through a desert trail, layering your hiking clothes properly is one of the easiest ways to stay healthy and comfortable on any hike. In this guide, we’ll break down the layering system, explain how to layer clothes to adjust for different weather conditions, and offer real-world gear tips to help you build the perfect hiking outfit.
Table of Contents
*This post may contain affiliate links. If you use them, I may earn a small commission at no extra cost to you.
🧥 What is the Hiking Layer System? (And Why Layering Matters)
Hiking involves constant change—weather, elevation, wind, and even your own pace and body temperature.
The hiking layer system is a strategic approach to dressing that uses multiple clothing layers with specific functions. Instead of wearing one heavy jacket, you combine lightweight pieces that can be added or removed as conditions change.
Here’s why layering beats single heavy garments every time:
- Temperature Control: Your body temperature fluctuates constantly while hiking—starting cold in the morning, warming up during climbs, cooling down at elevation, and potentially facing weather changes.
- Moisture Management: Proper layering moves sweat away from your skin while protecting you from external moisture like rain or snow.
- Versatility: Rather than carrying multiple complete outfits, you adjust your existing layers to match conditions.
- Weight Savings: Multiple thin layers weigh less than bulky single garments and pack more efficiently.
“There’s no such thing as bad weather, just bad clothing.” — my uncle (and every hiker ever)
I have learned this the hard way – by sweating in cotton, and then suffering the chilly wind, dragging a jacket that is too warm as well as freezing after forgetting the middle layer.
🔁 The 3-Layer System Explained
3-layer system is exactly what is sounds like. Its a way to be smart with hiking clothing. The basic idea is you have 3 layers in a specific order (and with specific functions), so that you can react to changes and add or remove a layer without having to dig or change your outfits in full once you reach the snow line.
1. Base Layer: Your Moisture-Wicking Foundation
Purpose: Moves sweat away from your skin to keep you dry and comfortable
This is the layer next to your skin. It wicks away sweat to keep you dry.
Your base layer sits directly against your skin, making fabric choice crucial. The best hiking base layers use materials that wick moisture efficiently and dry quickly. Which is why merino wool is my personal recommendation.
Best Materials for Base Layers:
- Merino wool: Natural odor resistance, temperature regulation, comfortable against skin
- Synthetic polyester: Quick-drying, durable, budget-friendly
- Bamboo blends: Soft, naturally antimicrobial, eco-friendly option
Avoid Cotton Base Layers: Cotton absorbs moisture and stays wet, which can lead to hypothermia in cold conditions or uncomfortable chafing in warm weather.
Base Layer Examples by Season:
- Summer: Lightweight synthetic t-shirt or merino wool short-sleeve
- Winter: Merino wool long-sleeve thermal top and bottom
- Shoulder seasons: Medium-weight long-sleeve base layer
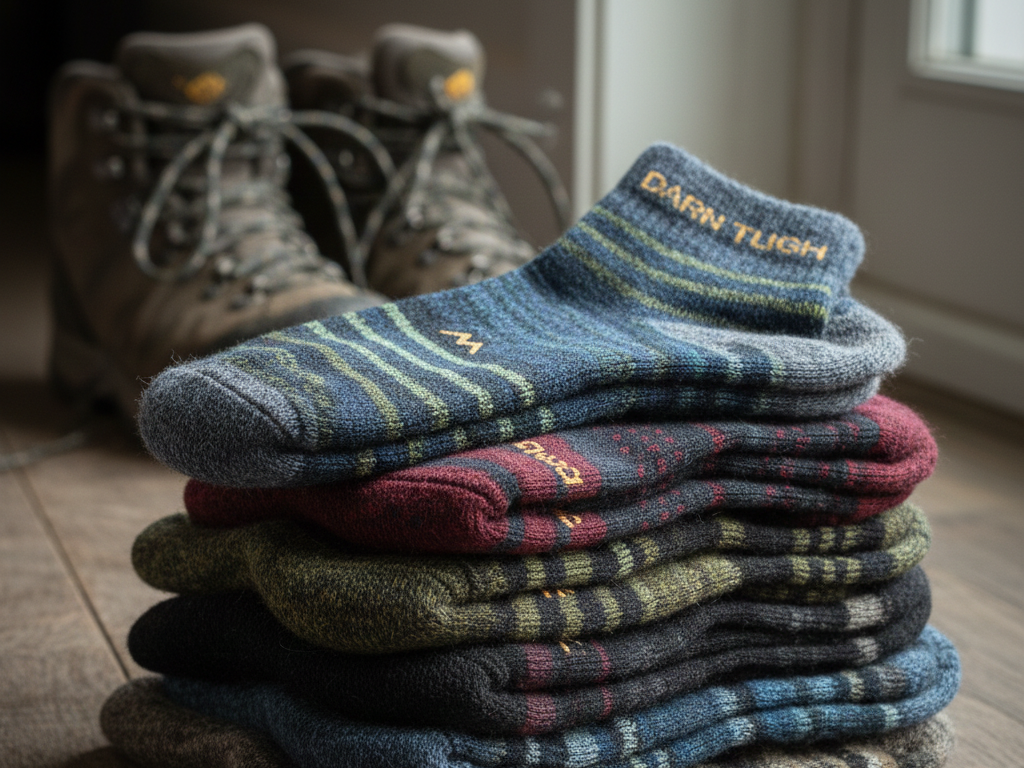
Ultimate hiking advice: Use Merino wool socks. ALWAYS the best option. Not familiar? Check this article: The Best Merino Wool Socks for Hiking (Goodbye, Blisters). Spoiler – Darn Tough socks win.
2. Mid Layer: Your Insulation Zone
Purpose: Traps warm air close to your body for insulation
The mid layer is your primary temperature regulation tool. You’ll add it when temperatures drop and remove it when you warm up during climbs.
Best Mid Layer Options:
- Fleece jackets: Breathable, quick-drying, maintains warmth when wet
- Down jackets: Excellent warmth-to-weight ratio for cold, dry conditions
- Synthetic insulation: Retains warmth when wet, more affordable than down
- Wool sweaters: Natural temperature regulation, odor-resistant
Pro Tip: Choose mid layers with full-zip fronts for easy temperature adjustment without removing your pack.
3. Outer Layer: Your Weather Shield
Purpose: Protects against wind, rain, and snow while allowing moisture to escape
Your shell layer is your first defense against harsh weather. The key is finding the right balance between protection and breathability.
Outer Layer Options:
- Hardshell jackets: Fully waterproof and windproof (Gore-Tex, eVent)
- Softshell jackets: Water-resistant, highly breathable, stretchy
- Rain ponchos: Budget-friendly, versatile, excellent ventilation
- Windbreakers: Lightweight wind protection for mild conditions
Look for These Features:
- Pit zips for ventilation
- Adjustable hood that fits over a helmet
- Longer back hem for coverage when bending over
- Durable water repellent (DWR) coating
I suggest a good rain-proof windbreaker for most occasions. If you use a cheap plastic rain poncho, you will probably feel as if you’re in a greenhouse. It may protect you from rain, but since there is often no airflow, you even if you’ll be protected from the rain, you will be wet from the sweat.
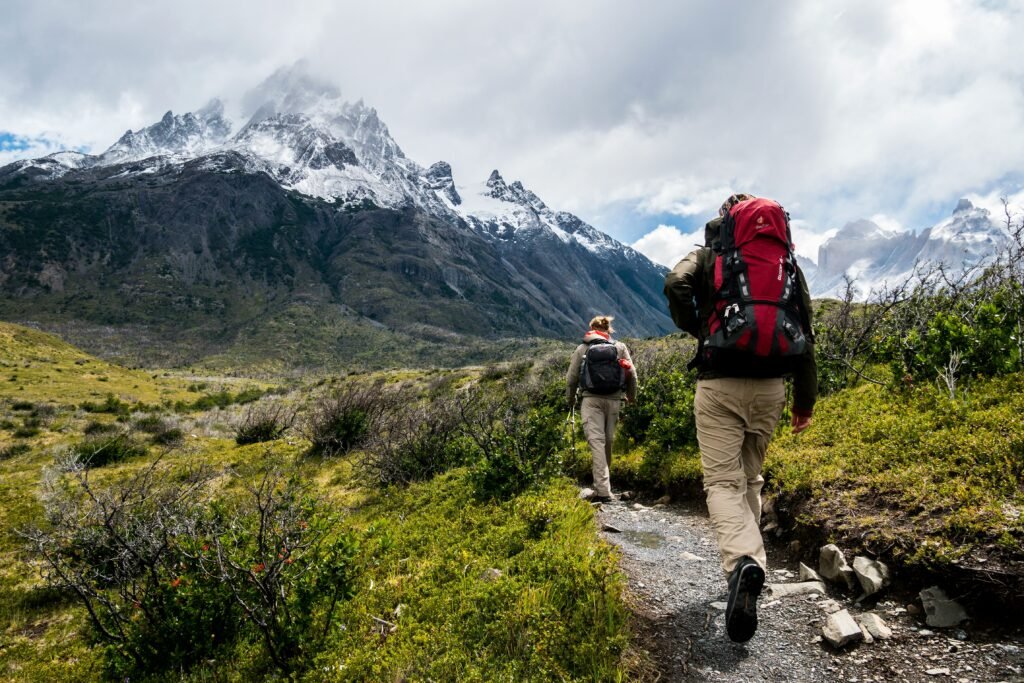
⛈️How to Layer for Different Weather Conditions
Hot Weather Hiking (75°F+ / 24°C+)
The Setup:
- Lightweight, long-sleeve sun shirt (UPF-rated)
- Convertible hiking pants or shorts
- Wide-brim hat
- Lightweight buff or bandana
Why Long Sleeves in Heat? They protect against UV rays and actually keep you cooler by preventing direct sun exposure on your skin.
Mild Weather Hiking (45-75°F / 7-24°C)
The Setup:
- Moisture-wicking base layer
- Light fleece or softshell mid layer (easily removable)
- Packable windbreaker or rain shell
- Lightweight hiking pants
Strategy: Start cool and layer up. You’ll warm up quickly once you start moving.
Cold Weather Hiking (Below 45°F / 7°C)
The Setup:
- Thermal base layer (top and bottom)
- Insulating mid layer (fleece or down)
- Waterproof/windproof shell
- Insulated hiking pants or soft shell pants with thermal leggings
- Warm hat, insulated gloves, neck gaiter
Cold Weather Strategy: Layer conservatively—it’s easier to add warmth than to cool down when you’re miles from the trailhead.
🌡️ Quick Guide: What to Wear by Temperature
| Temp (°F / °C) | Layering Combo | Notes |
|---|---|---|
| 75°F+ / 24°C+ | Light base layer (synthetic tee), sun hat | Use SPF fabric & ventilated clothing, don’t forget sunscreen |
| 60–75°F / 16–24°C | Base layer + optional windbreaker | Add light jacket if windy/rainy or high elevation |
| 45–60°F / 7–16°C | Base + fleece + wind/rain shell | Great for spring/fall hikes |
| 30–45°F / -1–7°C | Thermal base + fleece + waterproof shell | Use gloves + beanie |
| Below 30°F / -1°C | Add insulating mid (fleece), double base if needed | Always wear insulated boots, gloves, balaclava |
💡 Real Trail Examples
☀️ Zion NP Summer Hike (90°F / 32°C):
- Lightweight sun hoodie
- Breathable hiking shorts
- Wide-brim hat + polarized sunglasses
- Trail runners + ankle gaiters
🌲 Pacific Northwest Spring Trek (45°F / 7°C):
- Merino long-sleeve base
- Lightweight fleece pullover
- Rain shell with pit zips
- Convertible pants
🧊 Winter Ridge Hike in Colorado (20°F / -6°C):
- Wool thermal base
- Down jacket
- Gore-Tex shell
- Insulated gloves + balaclava + wool socks
🧤 Don’t Forget Accessories
Head and Hand Protection
- Sun hats: Wide brims for UV protection
- Warm hats: Merino wool or fleece beanies
- Lightweight gloves: For shoulder seasons
- Insulated gloves: Winter hiking essential
- Liner gloves: Thin gloves that work under mittens
Neck and Face Protection
- Buff or neck gaiter: Versatile protection against wind, sun, and cold
- Balaclava: Full face protection for extreme cold
- Sunglasses: Essential for snow glare and UV protection
Leg and Foot Gaiters
Gaiters keep debris, snow, and moisture out of your boots. Choose:
- Ankle gaiters: For light trail protection
- Knee-high gaiters: For snow and bush-whacking
- Waterproof gaiters: For wet conditions
❌ Common Mistakes to Avoid
- 🚫 Wearing cotton (it stays wet and chills you)
- 🚫 Too many warm layers = sweat overload → chills later
- 🚫 Forgetting wind protection even on mild days
- 🚫 No spare dry layer packed (weather changes fast!)
- 🚫 Using tight clothes that restrict movement or airflow
More on what to avoid: 10 Common Beginner Hiking Mistakes (And How to Avoid Them)
💰 Budget-Friendly Layering Tips
You don’t need expensive gear to layer effectively. Here are proven budget alternatives:
Affordable Base Layers
- Uniqlo Heattech: Excellent synthetic base layers under $20
- Costco merino wool: High-quality merino at fraction of brand-name prices or Merino.tech
- Workout clothing: Polyester athletic wear works great as base layers
Budget Mid Layers
- Decathlon fleece: Reliable fleece jackets starting around $25
- Thrift store wool sweaters: Vintage wool sweaters make excellent mid layers
- Military surplus: Wool sweaters and fleece from army surplus stores
DIY Outer Layer Solutions
- Poncho + pack cover: Lightweight, affordable rain protection
- Windbreaker + emergency bivy: Two-piece system for ultralight protection
📦 Layering Checklist
- Wicking base layer (top + bottom)
- Midlayer fleece or insulated jacket
- Waterproof/windproof outer shell
- Appropriate pants/shorts for weather
- Hat + gloves (season-dependent)
- Sunglasses + sun protection
- Dry change layer (just in case)
☀️Seasonal Layering Strategies
Spring Hiking Layers
Spring weather is notoriously unpredictable. Your layering strategy should prepare for rapid changes:
Core Setup: Base layer + fleece + waterproof shell Add: Lightweight gloves, warm hat, extra socks Pack: Additional warm layer in case temperatures drop
Summer Hiking Layers
Focus on sun protection and moisture management:
Core Setup: UPF long-sleeve shirt + hiking shorts/pants Add: Sun hat, sunglasses, lightweight buff Pack: Lightweight rain layer for afternoon storms
Fall Hiking Layers
Similar to spring but trending colder:
Core Setup: Base layer + mid layer + shell Add: Warm hat, lightweight gloves Pack: Extra insulation layer for early season snow
Winter Hiking Layers
Cold weather layering requires more careful planning:
Core Setup: Thermal base + insulating mid + weatherproof shell Add: Insulated gloves, warm hat, neck protection, gaiters Pack: Emergency shelter, extra food for calories
🥾Advanced Layering Tips for Experienced Hikers
The Microclimate Strategy
Different parts of your body have different temperature needs:
- Core: Keep slightly cool to prevent overheating
- Extremities: Keep warm to maintain circulation
- Head: Easily regulate temperature by removing/adding hat
Elevation-Based Layering
Temperature drops approximately 3.5°F per 1,000 feet of elevation gain. Plan your layers accordingly:
- Start cool for the climb
- Add layers at elevation or during breaks
- Pack extra warmth for summit conditions
Activity-Based Adjustments
- Steep climbs: Remove layers before you start sweating
- Ridge walking: Add wind protection
- Stream crossings: Ensure quick-dry materials
- Rest stops: Add insulation immediately to prevent cooling
🗑️Caring for Your Layering System
Washing and Maintenance
- Merino wool: Wash in cold water, air dry, use wool-specific detergent
- Synthetic materials: Machine wash warm, tumble dry low
- Down insulation: Use down-specific detergent, dry with tennis balls
- Waterproof shells: Reapply DWR coating annually
Storage Tips
- Avoid compression for down items when not in use
- Hang dry all items completely before storage
- Store in breathable bags to prevent mildew
- Check zippers and seams regularly for wear
🎯Building Your Perfect Layering Kit
Essential First Purchases
- Quality base layer (merino wool or synthetic)
- Versatile mid layer (lightweight fleece)
- Reliable outer shell (waterproof/breathable jacket)
- Appropriate hiking pants
- Warm hat and lightweight gloves
Upgrading Your System
As you gain experience, invest in:
- Specialized layers for your most common conditions
- Ultralight alternatives for backpacking
- Backup layers for multi-day trips
- Activity-specific gear (climbing, skiing, etc.)
Final Thoughts
Mastering hiking layers isn’t about owning fancy gear—it’s about choosing the right pieces, packing smart, and adapting to conditions as you go. Whether it’s summer sun or winter wind, layering lets you stay cool, warm, or dry without missing a step.
If you want a deeper dive in hiking gear, check this out: The Ultimate Hiking Gear Guide: What You Actually Need (Tested & Approved)


Leave a Reply to Hot weather hiking: How to Survive Hiking in Summer – Hike Before Destination Cancel reply