Last updated: June 2025
Getting lost in the woods sounds like a scene from a survival thriller— exciting until it’s you standing at an unmarked fork with no clue where the trail went. It happens more often than you’d think, even to experienced hikers. But here’s the good news: staying on track doesn’t require military-grade training. You just need to know how to read a trail map, understand your surroundings, and make a few smart choices before and during your hike.
Whether you’re new to hiking or looking to boost your off-grid confidence, this guide will walk you through how to navigate like a pro—with or without a phone signal.
Table of Contents
*This post may contain affiliate links. If you use them, I may earn a small commission at no extra cost to you.
🔍 Why Trail Navigation Still Matters
Even with GPS and apps, things go wrong:
- Trail signs fade or fall
- Junctions can be misleading
- Phones die, lose signal, or glitch
Real Talk: On a hike in Colorado, I once followed the wrong fork and tacked on 4 extra hours. A quick check of my map’s contour lines would’ve saved me the pain—and the blisters. (Did it really happen to me? No, but it is very likely)
Navigation isn’t about perfection. It’s about paying attention and staying in control.
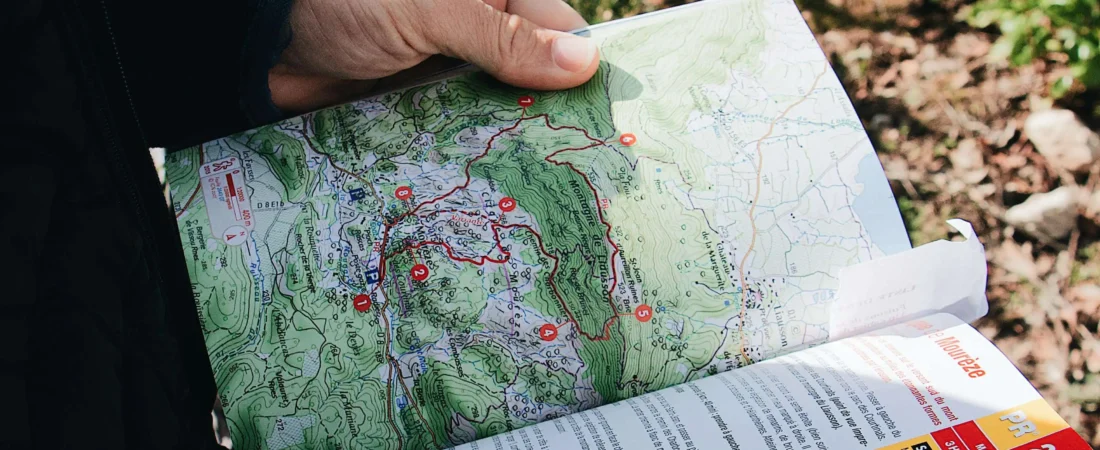
🗺️ Step 1: Know the Parts of a Trail Map
Before you hit the trail, learn to read the map before it’s an emergency.
Key Trail Map Elements:
- Trail lines: Solid or dashed paths indicating trails; wider lines often mean easier or more trafficked routes.
- Contour lines: Show elevation change. The closer the lines, the steeper the terrain.
- Scale bar: Converts map inches to real-life distance (e.g., 1” = 1 mile).
- Legend: Explains icons for campsites, trailheads, rivers, shelters, and danger zones.
- North arrow: Helps you orient your map to the land.
🧠 Pro Tip: Study the legend like it’s a cheat sheet—understanding icons is key to fast decision-making on the trail.
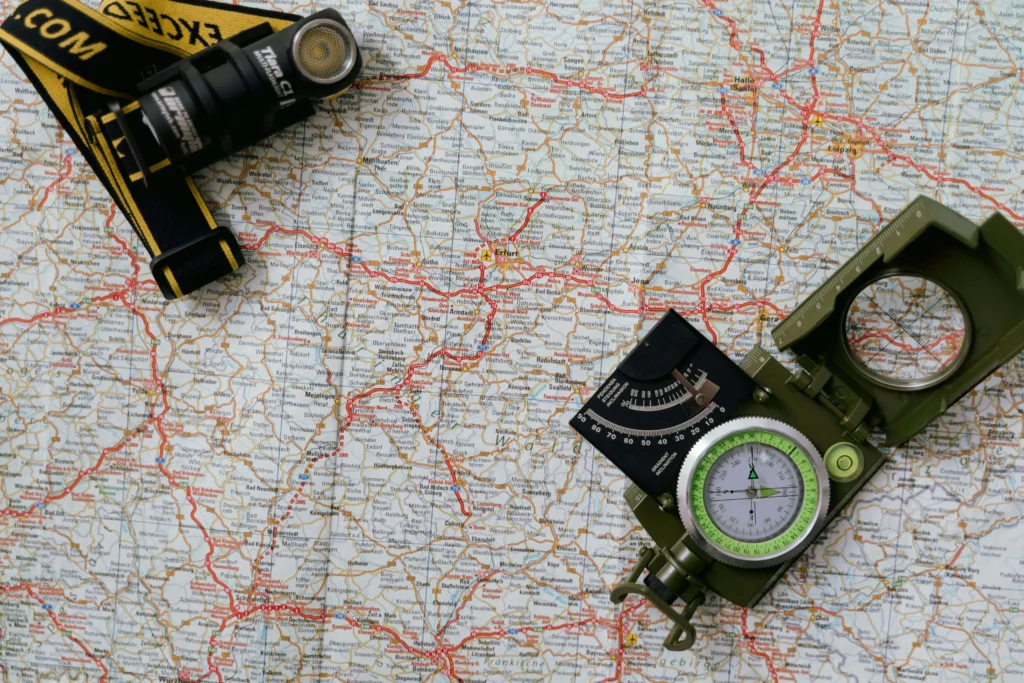
🧭 Step 2: Compass & GPS—Know When and How to Use Both
🧭 Using a Compass:
- Orient the map: Lay it flat and rotate it to match magnetic north using your compass.
- Match landmarks: Line up visible terrain with the map’s features (peaks, lakes, rivers).
- Take a bearing: Use your compass to find a direction, then walk along that bearing with confidence.
📱 Using GPS Apps:
- Download offline maps: Apps like Gaia GPS, AllTrails Pro, or onX Backcountry let you navigate without service.
- Track in real-time: View your movement over the map and identify key waypoints.
- Battery tips: Turn on airplane mode and lower screen brightness to conserve power.
✅ Best Practice: Bring both—a GPS for convenience and a compass + map for backup. Don’t rely on a single device.
🧠 Step 3: Prepare Before You Even Lace Your Boots
Great navigation starts at home. Here’s how to prep:
- Study the full route: Note forks, major elevation changes, and rest stops.
- Print or screenshot your map: Especially if you’re in a dead zone.
- Mark checkpoints: Identify trail junctions, rivers, or lookouts where you’ll pause to check progress.
- Learn bailout points: Know where to exit if the weather turns or you run out of time.
🔄 Mental Map Tip: Before the hike, trace the route with your finger and visualize what you’ll see—it’ll stick better in your mind than you think.
👀 Step 4: Stay Present on the Trail
✅ Stay Oriented:
- Check your map every 20–30 minutes—even if you think you know where you are.
- Watch for trail markers like painted blazes, rock cairns, or junction signs.
🔁 Look Back:
- Trails can look completely different on your return trip. Turn around occasionally to lock in visuals.
🧠 Use Your Intuition:
- If something feels off—no markers, trail fades, or weird detours—stop and reassess. Don’t push forward blindly.
⚠️ Warning Sign: Haven’t seen a blaze or marker in 10+ minutes? Pause and confirm your position.
🚨 What to Do If You Think You’re Lost

- Stop: Stay calm. Sit, drink water, and breathe.
- Think: When was the last place you were sure of your location?
- Observe: Look for landmarks—ridges, rivers, distinct rock formations.
- Plan: Consider retracing steps to your last known point.
If you are lost:
- Stay put. Moving often worsens the situation.
- Signal for help: Use a whistle (3 blasts), mirror, or bright gear.
- Use phone if possible to share GPS or location with rescuers.
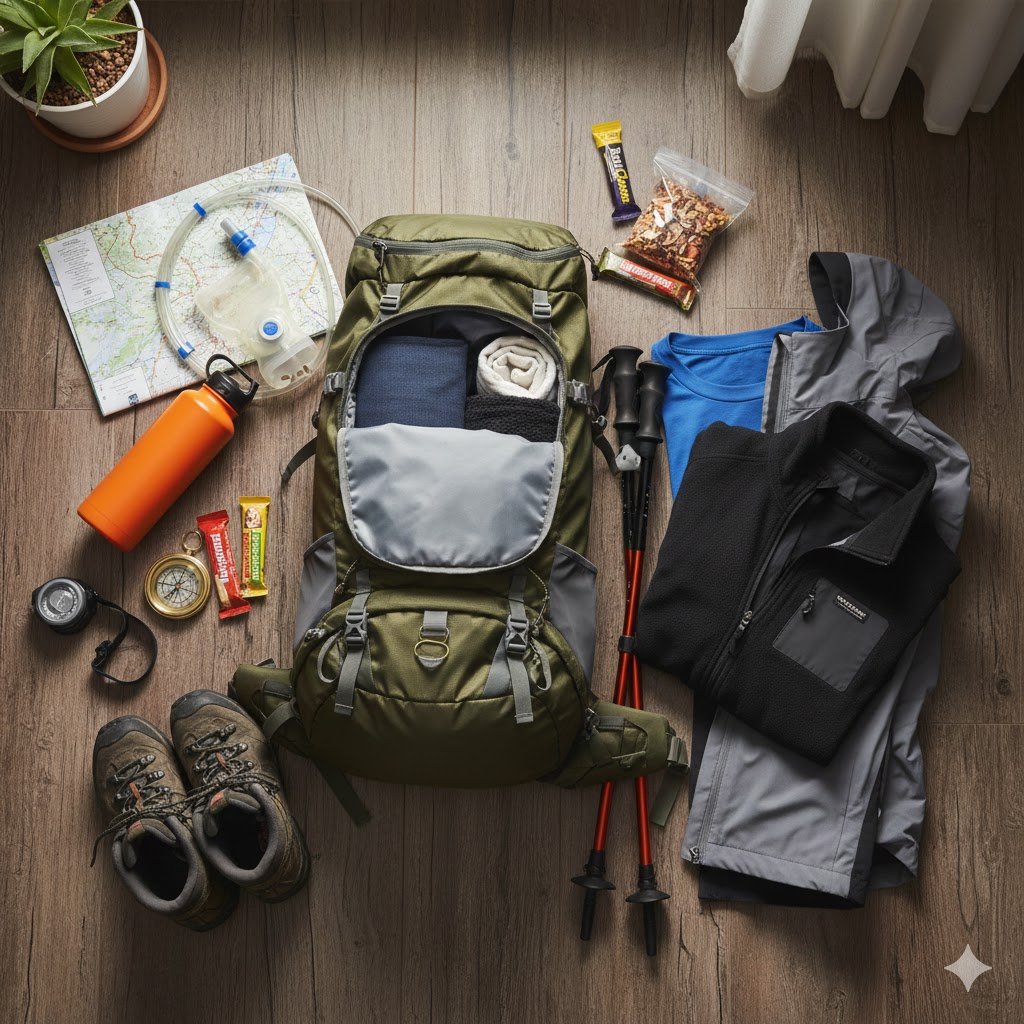
📚 Bonus: Tools Worth Bringing
| Tool | Use | Recommended Product |
| Paper Topo Map | Reliable backup | National Geographic Trail Maps |
| Compass | Bearings & orientation | Suunto A-10 Compass |
| GPS App | Real-time nav | Gaia GPS Premium |
| Power Bank | Extend phone use | Anker Portable Charger |
| Whistle | Emergency signal | Fox 40 Classic Safety Whistle |
🔚 Final Thoughts
Trail navigation isn’t just about not getting lost—it’s about freedom. Once you understand how to read a trail map and navigate with basic tools, you’ll unlock new trails with confidence. You’ll move smarter, stress less, and explore deeper.
So before your next hike, prep your route, pack your tools, and practice staying aware. That peace of mind? Totally worth the effort.
Want more confidence on the trail? Check out: “How to Start Hiking: A Beginner’s Step-by-Step Guide” for tips on gear, mindset, and safety.
If you have comment or questions, feel free to contact me!
Happy hiking—and stay found out there.


Leave a Reply to How to Start Hiking: A Beginner's 12 Step Guide – Hike Before Destination Cancel reply